
Configure
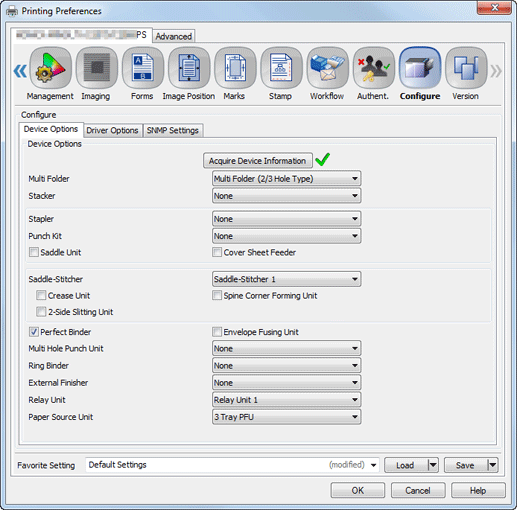
Device Options
Item Name | Function |
|---|---|
[Acquire Device Information] | Press this to detect an optional device installed on this machine.
|
[Multi Folder] | Set the punch, PI cover sheet, and fold functions. |
[Stacker] | Stack a large number of printed documents on a stacker. A large number of printed sheets can be output to the Open Stacker Tray. |
[Stapler] | Set this to use the staple function. |
[Punch Kit] | Set this to use the punch function. |
[Saddle Unit] | Set this to use functions such as [Multi Tri-Fold], [Multi Half-Fold], and [Fold and Staple]. |
[Cover Sheet Feeder] | Coated paper or other paper can be inserted to keep the heat from the main body from interfering. |
[Saddle-Stitcher] | Set this to use functions such as [Fold and Staple], [Fold and Staple + Trim], and [Multi Half-Fold]. |
[Crease Unit] | You can use the crease function for fold processing. |
[Spine Corner Forming Unit] | You can use the spine corner forming function for fold processing. |
[2-Side Slitting Unit] | You can use the 2-side slitting function for fold processing. |
[Perfect Binder] | Set this to use the perfect binder function. |
[Envelope Fusing Unit] | Envelope print is available. |
[Multi Hole Punch Unit] | Set this to use the multi-hole punch function. |
[Ring Binder] | Set this to use the ring bind function. |
[External Finisher] | Select this option to use the External Finisher. |
[Relay Unit] | Select this option to use the Relay Unit or Intelligent Quality Optimizer. |
[Paper Source Unit] | Select Tray 3 to 5, or Bypass tray as the paper tray. |
 : Could acquire device information.
 : Could not acquire device information.
Even when the setting items are indicated on the screen, it does not enable the setting depending on the presence or absence of the optional devices.
Driver Options
Item Name | Function |
|---|---|
[Acquire information at the start of driver] | Select this to acquire information when the driver starts. |
[Destination Setting] | To check device option information of another main body, select [Specify IP address or printer name], then enter the IP address or printer name. This function is helpful when the driver has the destination set to another server instead of the main body. |
[Secure Print Only] | Select this to allow only secure printing. |
[Show Secure Print Dialog] | Select this option to display the [Secure Print] dialog box in which you can enter the ID and password for Secure Print when printing data. |
[Allow Changing User Name] | Select this to allow the user name to be changed. |
[Allow Changing User Authentication Password] | Select this to allow the user authentication password to be changed. |
[MacOS Keychain] | User Name and Password can be registered with key chain access when setting User Authentication and Account Track.
|
[Normalize PostScript] | Set this to use the applications that have their own PostScript driver based on a PPD.
|
[Unit] | Select either [Metric] or [Imperial] for the units of measurement. |
[Language] | Set a language.
|
[Configure General Panel] | You can set the item to be displayed on the [General] tab. |
[Customize Panel Display] | Specify the order to display panel icons to be displayed on the printer driver as well as whether to display them. |
SNMP Settings
Item Name | Function |
|---|---|
[SNMP Version] | Specify the SNMP (Simple Network Management Protocol) version. |
[Read Community Name ] | Specify the community name. Reenter the community name for confirmation in Reenter field. |
[Context Name] | Enter the context name. |
[Read User Name] | Enter the user name. |
[Security Level] | Specify the security level. [Auth-Password]: The password is necessary to be authenticated. [Auth-Password/Priv-Password]: The encrypted password is necessary to be authenticated. |
[Read User Auth- Password] | Enter the auth-password. Reenter the auth-password for confirmation in Reenter field. |
[Read User Priv- Password] | Enter the encryption password. Reenter the encrypted auth-password for confirmation in the Reenter field. |
When SNMP setting is specified on the machine, it is necessary to enter the name or other information to the corresponding fields. For details about the information to enter, contact the administrator of the machine.

For details about the paper sizes that can be loaded in the tray, refer to Paper Size Available for Use.