
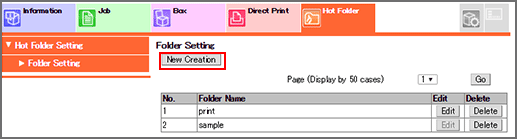
Creating a New Hot Folder
Click [New Creation].
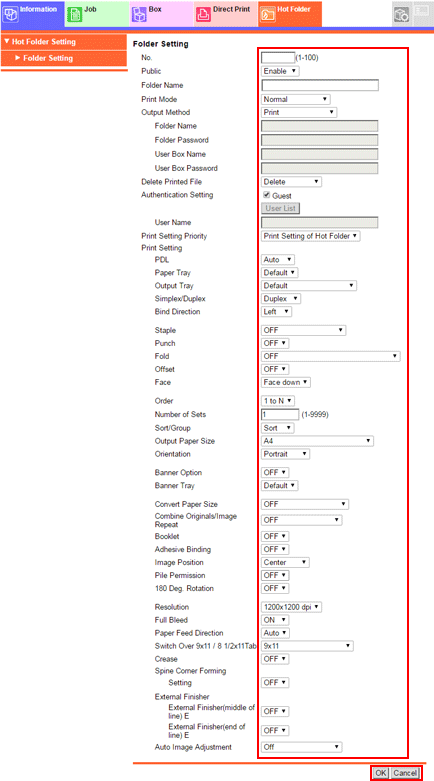
Make a setting for each item.
Item
Description
[No.]
Enter a free No.
[Public]
Select [Enable] to share the hot folder, or [Disable] to have it exclusive.
[Folder Name]
Enter a folder name.
[Print Mode]
Select a print mode.
[Output Method]
Select whether to print data, save data, save data without RIP, or perform both the printing and data saving. To save data, specify a destination folder or user box and enter the password.
[Delete Printed File]
Select whether or not to delete printed files.
[Authentication Setting]
To allow anyone to access the hot folder, check the [Guest] checkbox.
[User Name]
Lists only users registered with both user name and user password in [User Setting]. Users selected on this list are displayed in [User Name].
[Print Setting Priority]
Select either to use the print setting specified for the hot folder ([Hot Folder's Print Setting]) or to use the print setting specified for each job ([Each Job's Print Setting]).
[Print Setting]
Enables you to edit a print setting.
[PDL]
Select the default page description language ([PDL]).
[Paper Tray]
Select a [Paper Tray]. Setting options vary with the optional configuration.
[Output Tray]
Select [Output Tray]. Setting options vary with the optional configuration.
[Simplex/Duplex]
Select [Simplex] or [Duplex] for printing.
[Bind Direcition]
Select [Bind Direction].
[Staple]
Select whether to apply [Staple].
[Punch]
Select whether to apply [Punch].
[Fold]
Select whether to apply [Fold]. Setting options vary with the optional configuration.
[Offset]
Select whether to offset the output sheets ([Offset]).
[Face]
Select [Face down] or [Face up] to output sheets.
[Order]
Select [1 to N] or [N to 1] to output sheets.
[Number of Sets]
Specify [Number of Sets].
[Sort/Group]
Select whether to print all pages of the first copy followed by all pages of the next ([Sort]) or to print page 1 by the required number of sets and then print page 2 and the subsequent pages ([Group]) when printing multiple sets.
[Output Paper Size]
Select [Output Paper Size].
[Orientation]
Select [Portrait] or [Landscape].
[Banner Option]
Select whether to print the banner page (cover page) showing the sender or title of the print job.
[Banner Tray]
Select the paper tray used to print banner pages.
[Convert Paper Size]
Select the paper size to be converted when the paper specified in the Direct Print Setting is not loaded in the tray.
[Combine Originals/Image Repeat]
Select [2-in-1], [2 Repeat], or other option.
[Booklet]
Select whether to apply [Booklet] for printing.
[Adhesive Binding]
Select whether to apply [Adhesive Binding] for printing.
[Image Position]
Select [Image Position].
[Pile Permission]
When [ON] is selected, other jobs can be printed, allowing sheets to be piled up on the large capacity stacker. When [OFF] is selected, the next job cannot be printed until the current job is removed from the large capacity stacker.
[180 Deg. Rotation]
When [ON] is selected, the image is rotated 180 degrees for printing.
[Resolution]
Select [Resolution].
[Full Bleed]
Select [ON] or [OFF].
[Paper Feed Direction]
Select whether to specify [Auto] or [LEF] for long-edge paper feeding or specify [SEF] for short-edge paper feeding.
[Switch Over 9x11 / 8 1/2x11Tab]
Select the index switch mode.
[Crease]
Select whether to apply [Crease].
[Spine Corner Forming Setting]
Select whether to apply Spine Corner Forming.
[External Finisher]
Select whether to apply [External Finisher].[ON] is only available when the external finisher is installed on this machine.
[Auto Image Adjustment]
Select this option when adjusting the image position or gradation.
Click [OK]. Clicking [Cancel] cancels the setting.
Click [OK] on the setting complete screen.

When printing a file which is not specified in [Each Job's Print Setting], such as a PDF file, the conditions specified in [Direct Print Setting] - [Basic Setting] in [Controller] will be used. For details about [Basic Setting], refer to Basic Settings: Registering Direct Print Initial Settings.