
Scanner Settings
Click [DPWS Settings] - [Scanner Settings] on the menu of [Network] tab to display this screen.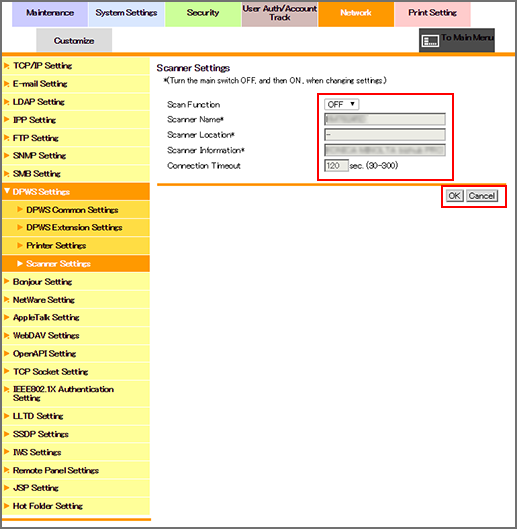
This screen allows you to configure settings to scan data via the Web service.
If you want to scan data using Web service, select [ON] from the [Scan Function] drop-down list.
Enter a scanner name. Up to 63 one-byte characters can be used.
If necessary, enter [Scanner Location], [Printer Information], and [Connection Timeout].
Click [OK]. Clicking [Cancel] cancels the setting.
Click [OK] on the setting complete screen.
If you have changed any setting with an asterisk (*), turn the machine power off then on.