
NetWare Setting
Click [NetWare Setting] - [NetWare Setting] on the menu of [Network] tab to display this screen.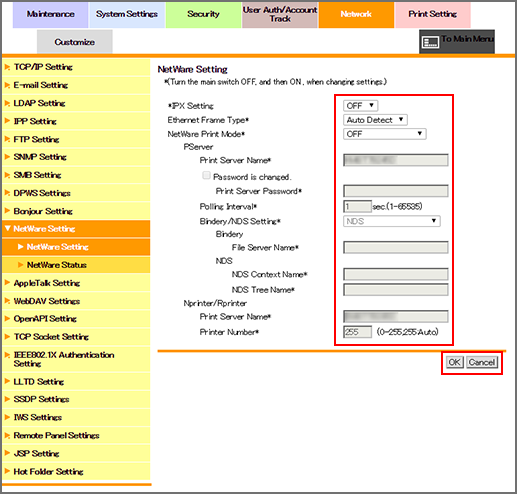
This screen allows you to configure settings to connect the machine to a NetWare environment and use it.
To use IPX, select [ON] from the [IPX Setting] drop-down list.
Specify [Ethernet Frame Type] according to your environment.
To print data via NetWare, .select an operation mode of the print server from the [NetWare Print Mode] drop-down list.
If you have selected [Pserver] for [NetWare Print Mode], specify the following items.
[Print Server Name]: Enter a print server name (up to 63 one-byte characters).
[Print Server Password]: Enter a password for the print server (up to 63 one-byte characters).
[Polling Interval]: Specify an interval between job queries. The default value is [1] second.
[Bindery/NDS Setting]: Select [NDS] or [NDS/Bindery]. The default value is [NDS].
[File Server Name]: Enter a priority file server name in Bindery mode (up to 47 one-byte characters).
[NDS Context Name]: Enter an NDS context name connected via the printer server (up to 191 one-byte characters).
[NDS Tree Name]: Enter an NDS tree name connected via the printer server (up to 63 one-byte characters).
If you have selected [Nprinter/Rprinter] for [NetWare Print Mode], specify the following items.
[Print Server Name]: Enter a print server name (up to 63 one-byte characters).
[Printer Number]: Enter a printer number.
Click [OK]. Clicking [Cancel] cancels the setting.
Click [OK] on the setting complete screen.
If you have changed any setting with an asterisk (*), turn the machine power off then on.