
Setting Up Remote Panel / Remote Monitor / Multi Monitor
Display the [Main page] screen of Web Utilities.
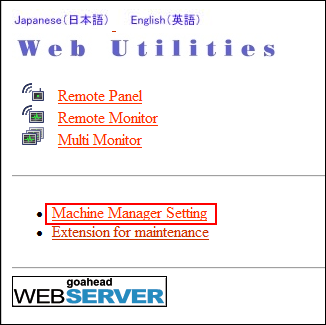
Click on [Machine Manager Setting].
The password entry dialog box is displayed.
Enter "admin" in the User Name text box, and the 8-character administrator password in the password text box, then click on [OK].
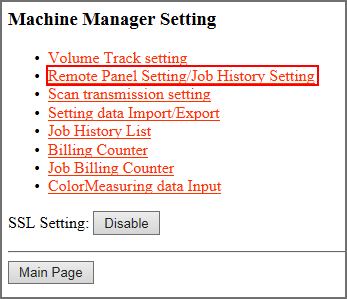
The [Machine Manager Setting] screen is displayed.
Click on [Remote Panel Setting/Job History Setting].
The [Remote Panel Setting/Job History Setting] screen is displayed.
Make settings for Remote Panel.
Specify the IP address of the computer to be used for the remote panel. Up to 3 addresses can be specified. Real-time remote panel, however, does not support the concurrent connection from multiple computers.
If you do not make settings other than this setting, click [Registration] at the bottom of the window, and then click on [Administrator Setup Menu].
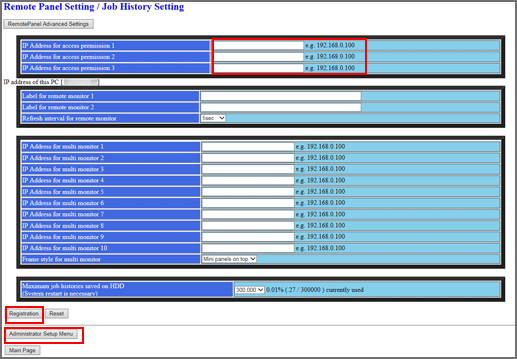
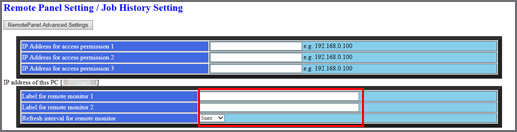
Make settings for Remote Monitor.
Enter the user label for the Remote Monitor, and select the desired refresh interval.
If you do not make settings other than this setting, click [Registration] at the bottom of the window, and then click on [Administrator Setup Menu].
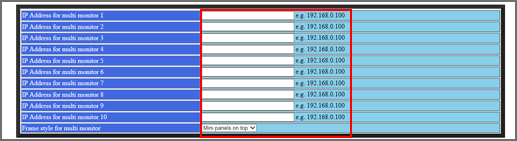
Make settings for Multi Monitor.
Up to 10 machines to be displayed on Multi Monitor can be registered.
When Image Controller IC-603 has been mounted, enter the IP address and port number.
(ex) If the IP address of the machine is 192.168.1.20, enter "192.168.1.20:30091."
When Image Controller IC-313, Image Controller IC-314, or Image Controller IC-417 has been mounted, enter the IP address.
(ex) If the IP address of the machine is 192.168.1.20, enter "192.168.1.20."
Select either to display the multi monitor at the top of the remote panel or on the left side of the remote panel.
If you do not make settings other than this setting, click [Registration] at the bottom of the window, and then click on [Administrator Setup Menu].
Click [Register].
The [Registered as follows] screen is displayed. The new data is registered to the machine immediately.
Click on [Administrator Setup Menu].
The screen returns to the [Machine Manager Setting] screen.