
Specify Information of a Job and a Color Bar
This section describes how to configure items to be printed outside the image area.
Click [File] - [Color Verification].
[Color Verification] screen appears.
Click [The Color Setting Information], then select items.
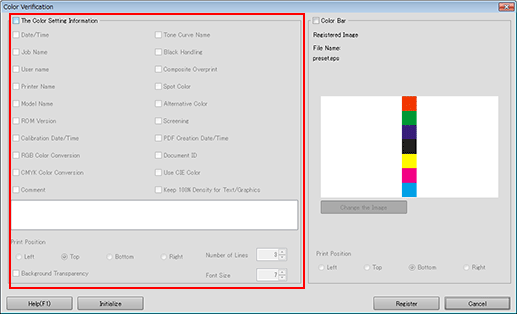
To specify a printing position, select the radio button in [Print Position].
To specify the number of printing lines, select the number in [Number of Lines]. (1 to 5)
To change the font size, specify the numeric value in [Font Size].
Select [Color Bar].
The image that is registered as the color bar is displayed.
To use another file, click [Change the Image] and then specify an eps file.
To specify the print position, select an option button in [Print Position].
Click [Register].
The setting is registered in the image controller.
[Color Verification] is closed to return to [Color Default Settings] screen.
To cancel the setting and return to the default, click [Initialize].