
Adjusting Hue
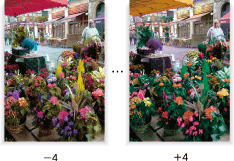
The hue adjustment varies each shade of red (R), yellow (Y), green (G), cyan (C), blue (B), and magenta (M) to the rotation direction of the color circle.
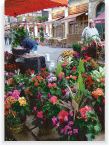
Original | Output |
|---|---|
| Hue
|
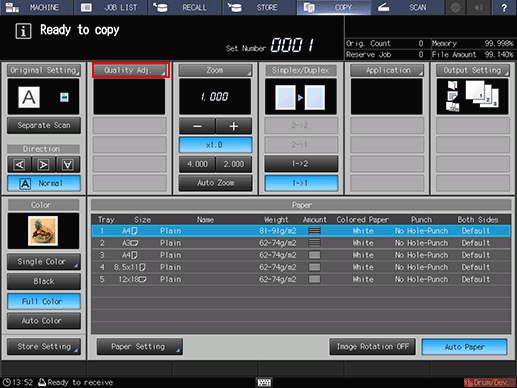
Press the [COPY] tab to display the [COPY] screen.
Press [Quality Adj.] on the [COPY] screen.
Position the original.
Prepare an original for adjusting the hue, and position it into the ADF or on the original glass.
Make an adjustment for Hue on the [Quality Adjustment] screen.
Use [-] and [+] on the right side of [Hue] to specify the desired adjustment level.
Specify a negative level to make red closer to magenta, green closer to yellow, and blue closer to cyan; or, specify a positive level to make red closer to yellow, green closer to cyan, and blue closer to magenta.

To make the adjustment for Hue on the [Hue] screen, proceed to step 5.
To output a sample copy to check the adjustment result, proceed to step 6.
To complete the adjustment, proceed to step 7.
If you press [Default Set] on the [Quality Adjustment] screen, all adjustment items are returned to the standard level.
Make the hue adjustment for red, green, and blue collectively on the [Hue] screen.
Press [Hue] to display the [Hue] screen.
Press [-] to specify a negative adjustment level to make red closer to magenta, green closer to yellow, and blue closer to cyan.
Press [+] to specify a positive adjustment level to make red closer to yellow, green closer to cyan, and blue closer to magenta.
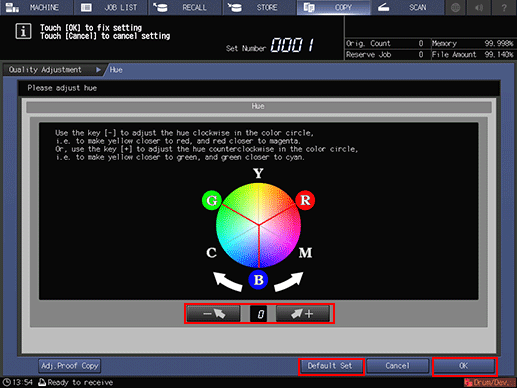
To resume the standard level, select [0].
To resume the standard level and return to the [Quality Adjustment] screen, press [Default Set].
To output a sample copy to check the adjustment result, proceed to step 6.
To complete the adjustment, proceed to step 7.
If you press [Default Set] on the [Hue] screen, adjustment items are returned to the standard level.
Output a sample copy.
After making the desired adjustment, press [Adj.Proof Copy] on the [Quality Adjustment] screen, [Adj.Proof Copy] on the [Hue] screen, or Proof Copy on the control panel. Check the adjustment result with output image.
Repeat steps from 3 to 6 until the desired result is obtained.
Press [Close] on the [Quality Adjustment] screen.
The screen returns to the [COPY] screen. The [Hue] indication can be found under [Quality Adj.] on the [COPY] screen.