
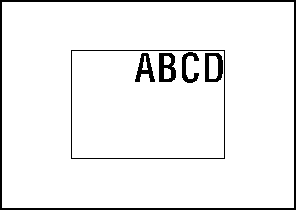
[Image Centering]: Copying the Document Area onto the Center of Paper
Use this function to position the document area in the center of copy paper when copying data.
Original positioning | Output |
|---|---|
|
|
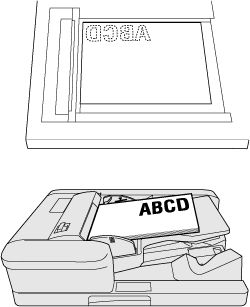
Position the original.
Both ADF and original glass are available.
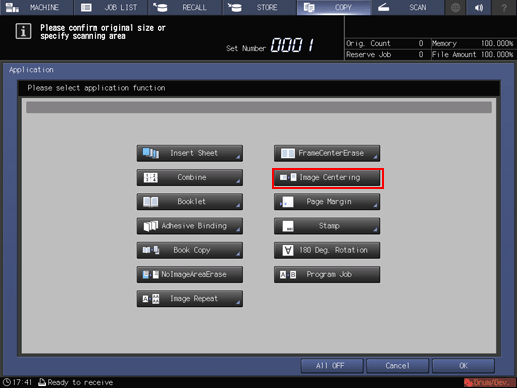
Press [Application] on the [COPY] screen.
Press [Image Centering] on the [Application] screen.
[No Image Area Erase] is set automatically, but it is released when the ADF is used. [No Image Area Erase] can be released manually. The incompatible function keys are dimmed to show inactivity.
Press [OK] on the [Application] screen to return to the [COPY] screen.
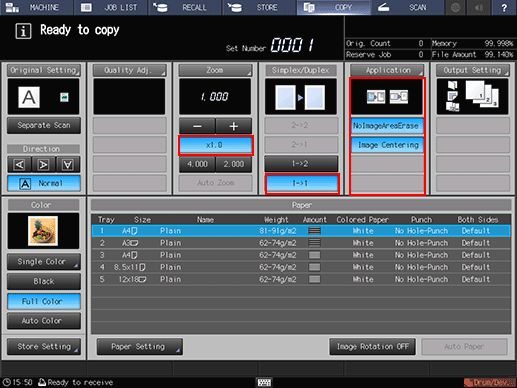
The [Image Centering] and [No Image Area Erase] icons and shortcut keys are displayed under [Application] on the [COPY] screen.
The [Auto Paper] and [Auto Zoom] buttons are dimmed and [x1.0] magnification is set.
Available copy modes are [1->1] and [1->2]. Selecting [1->2] sets [Separate Scan] automatically.
Enter the desired print quantity from the keypad on the control panel.
Press Start on the control panel.
Printing does not start without returning to the [COPY] screen. Be sure to display the [COPY] screen.
Image Centering may perform incorrectly if the lighting in the work place is directly over the original glass. In this case, consult your service representative about an appropriate place for installation.