
Sorting Copies to Primary (Main) Tray
Select an output mode by following the procedure below.
Position the original.
Press the [COPY] tab to display the [COPY] screen.
Press [Output Setting].
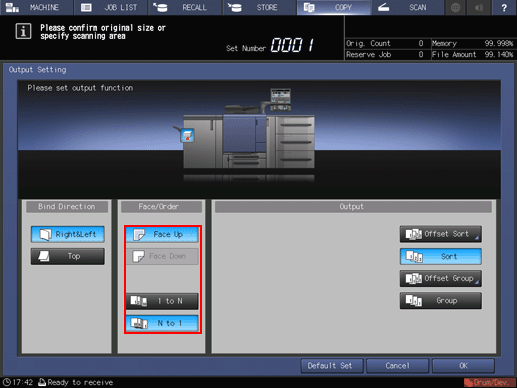
The [Output Setting] screen is displayed.
Select the desired output mode.
Select one of [Offset Sort], [Sort], [Offset Group], and [Group] keys.

Select either [Face Up] or [Face Down], and either [1 to N] or [N to 1] provided under [Face/Order], as needed.
Selecting [N to 1] automatically sets and limits the Face mode to [Face Up].
Press [OK] on the [Output Setting] screen.
An icon representing specified function is displayed under [Output Setting] on the [COPY] screen.

The primary (main) tray gradually goes down while printed materials are output. DO NOT allow any object to interfere with the operation of the primary (main) tray on the left side of the finisher, as any interference may cause damage to the finisher.
The primary (main) tray has a limit in capacity. Be careful not to exceed the limit, otherwise unexpected trouble may be caused
Mount the paper holder on the primary (main) tray.
It is recommended to mount the paper holder on the primary (main) tray before using thin paper or paper that curls easily for output. It is no problem to keep the holder mounted for normal printing.