
Parallel Trimming Adjustment: Adjusting the Levelness between the Trimming Line and Cut Edge
Adjust the levelness between the trimming line and cut edge in Saddle Stitcher SD-513.
Objects of Adjustment: Front, rear

This adjustment is available only when Saddle Stitcher SD-513 is equipped with Folding Unit FD-504.
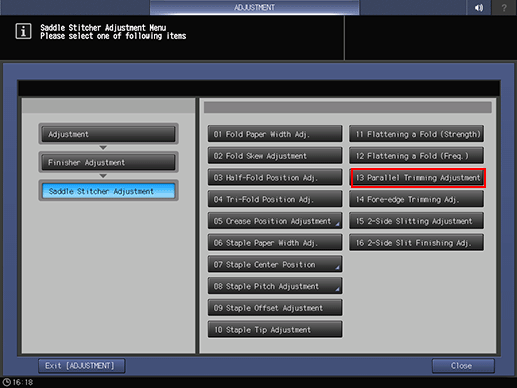
Press [Adjustment] on the [MACHINE] screen to display the [Adjustment Menu] screen.
Press [Finisher Adjustment], [Saddle Stitcher Adjustment], and [Parallel Trimming Adjustment] in sequence.
Select [Front] or [Rear].
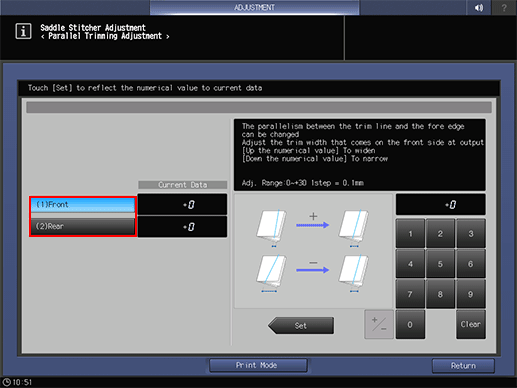
Press [Print Mode].
Load A3
 paper or 11
  17 paper into any tray, then select its tray button.
Press Start on the control panel.
A sample pattern will be output.
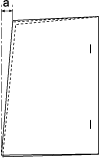
Measure levelness a of the trimming edge.
Allowance: a = 4.0 mm or less (when 50 sheets are folded and stapled in Fold & Staple)
If any adjustment is required, press [Exit PrintMode] to return to the [Trimming Levelness Adjustment] screen.
Use the touch panel keypad to enter the set value.
Press [Set] to change the Current Value.
Adjustment Range: -0 ([To narrow]) to +30 ([To widen]) (1 step = 0.1 mm)

Repeat steps 4 to 9 until the desired result is obtained.
Press [Return].
The screen returns to the [Saddle Stitcher Adjustment Menu] screen.