
2-Side Slitting Adjustment: Adjusting the 2-Side Slitting
Adjust the 2-side slitting in Trimmer Unit TU-503 mounted on Saddle Stitcher SD-513.
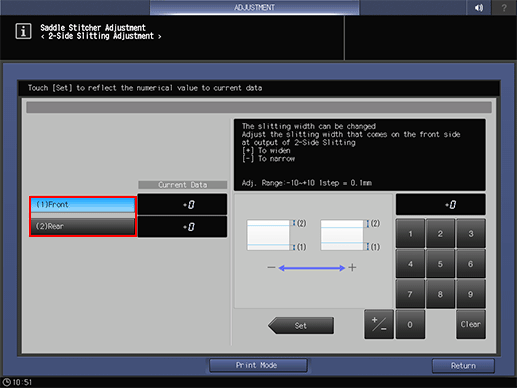
Objects of Adjustment: Front, rear
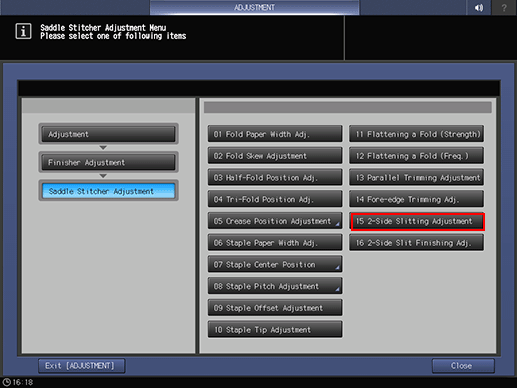
Press [Adjustment] on the [MACHINE] screen to display the [Adjustment Menu] screen.
Press [Finisher Adjustment], [Saddle Stitcher Adjustment], and [2-Side Slitting Adjustment] in sequence.
Select [Front] or [Rear].
Press [Print Mode].
Load A3
 paper or 11
  17 paper into any tray, then select its tray button.
Press Start on the control panel.
A sample pattern will be output.
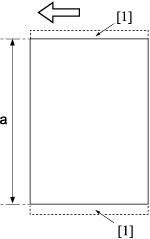
Measure the length of output paper, "a", then check the difference between the measurement value and the set value.
Allowance: a = Setting value -a = ± 0.5 mm or less
If any adjustment is required, press [Exit PrintMode] to return to the [2-Side Slitting Adjustment] screen.
Use the touch panel keypad to enter the set value.
Use [+/-] to specify the value to be positive or negative.
Press [Set] to change the Current Value.
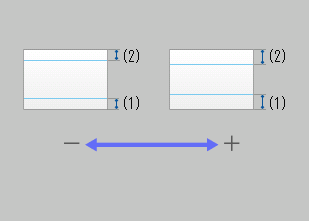
Adjustment Range: -10 ([To narrow]) to +10 ([To widen]) (1 step = 0.1 mm)
Repeat steps 4 to 9 until the desired result is obtained.
Press [Return].
The screen returns to the [Saddle Stitcher Adjustment Menu] screen.