
Horizontal Position Adj.: Adjusting the Distance from the Edge of the Printed Paper to the Center of Punch Holes
Adjust the distance from the edge of the printed paper to the centers of punch holes, when using Punch Kit PK-512 or Punch Kit PK-513 mounted on Finisher FS-531 or Finisher FS-612.
Objects of Adjustment: PI Tray, Main Body Tray
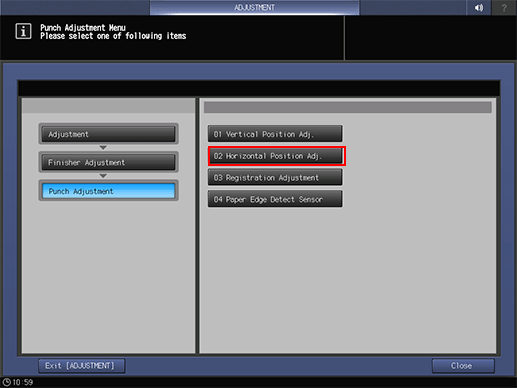
Press [Adjustment] on the [MACHINE] screen to display the [Adjustment Menu] screen.
Press [Finisher Adjustment], [Punch Adjustment], and [Horizontal Position Adj.] in sequence.
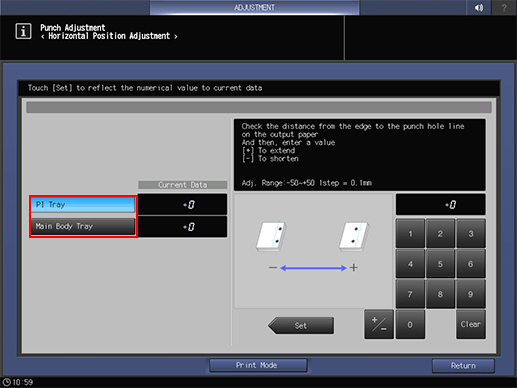
Select either [PI Tray] or [Main Body Tray].
Press [Print Mode].
Select the tray loaded with paper.
Press Start on the control panel.
A sample pattern will be output.
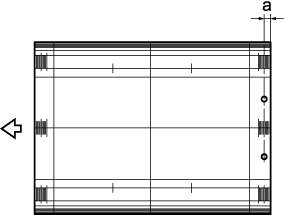
Measure the distance (a) from the edge of the printed paper to the centers of punch holes.
Allowance: a = 10.5 mm ± 5.0 mm
If any adjustment is required, press [Exit PrintMode] to return to the [Horizontal Position Adjustment] screen.
Use the touch panel keypad to enter the set value.
Use [+/-] to specify the value to be positive or negative.
Press [Set] to change the current value.
Adjustment Range: -50 ([To shorten]) to +50 ([To extend]) (1 step = 0.1 mm)

Repeat steps 4 to 9 until the desired result is obtained.
Press [Return].
The screen returns to the [Punch Adjustment Menu] screen.