
Registration Adjustment: Adjusting the Skew of Punch Holes Position
Adjust the registration loop amount if punch holes are positioned obliquely when using Punch Kit PK-512 or Punch Kit PK-513 mounted on Finisher FS-531 or Finisher FS-612.
Objects of Adjustment: Main Body/Reverse, Main Body/ADU, PI 1 Tray, PI 2 Tray
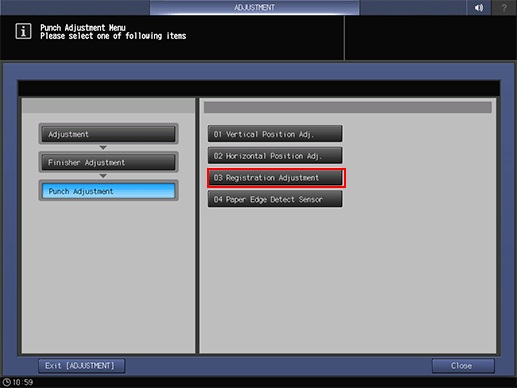
Press [Adjustment] on the [MACHINE] screen to display the [Adjustment Menu] screen.
Press [Finisher Adjustment], [Punch Adjustment], and [Registration Adjustment] in sequence.
Press the key of the item to be adjusted.
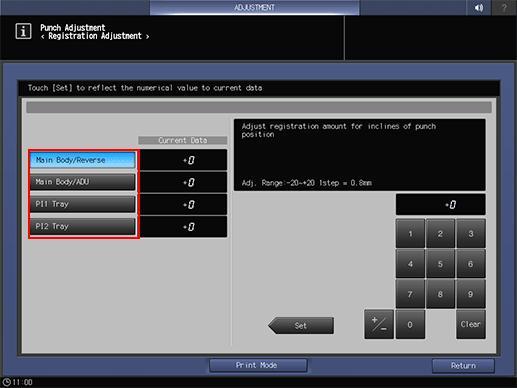
Press [Print Mode].
Select the tray loaded with paper.
Press Start on the control panel.
A sample pattern will be output.
Check if the punch holes are skew on the printed paper.
If any adjustment is required for the registration amount, press [Exit PrintMode] to return to the [Registration Adjustment] screen.
Use the touch panel keypad to enter the set value.
Use [+/-] to specify the value to be positive or negative.
Press [Set] to change the current value.
Adjustment Range: -20 (Increase Registration Loop) to +20 (Reduce Registration Loop) (1 step = 0.8 mm)
Repeat steps 4 to 9 until the desired result is obtained.
Press [Return].
The screen returns to the [Punch Adjustment Menu] screen.