
Lead Edge Erase Adjustment: Adjusting the Amount of Image Erasure for Printing
Adjust the amount of image to be erased from the edge of the sheet.
Adjustment Range: -20 to +40 (1 step = 0.1 mm)
Follow the procedure on Administrator Setting to display the [Administrator Setting Menu] screen.
Press [System Setting] on the [Administrator Setting Menu] screen, and then press [Expert Adjustment], [Printer Adjustment], and [Lead Edge Erase Adjustment] in sequence.
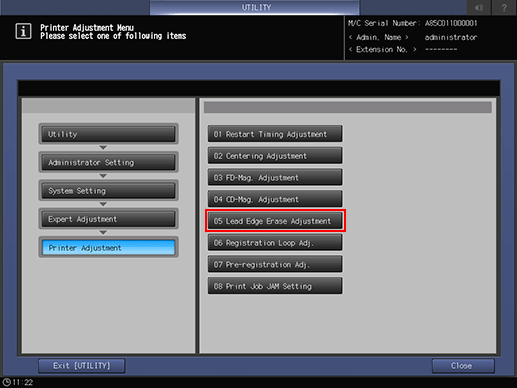
The [Lead Edge Erase Adjustment] screen is displayed.
Press [Print Mode].
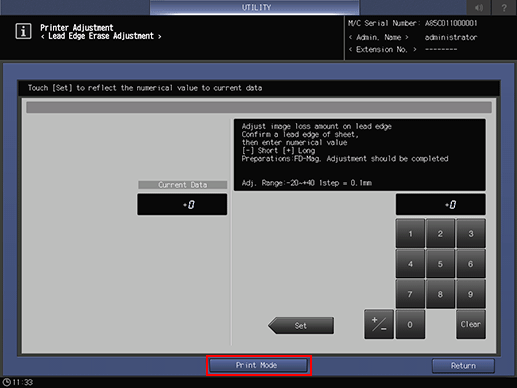
The [PRINT MODE] screen is displayed.
Select A3
 paper, then press Start on the control panel.
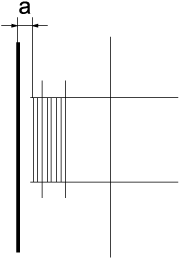
A sample pattern will be output.
Press [Exit PrintMode] to return to the [Lead Edge Erase Adjustment] screen.
Measure the resultant restart timing.
If any adjustment is required, enter the desired adjustment value using the touch panel keypad.
Use [+/-] to specify the value to be positive or negative.
Press [Set] to change the current value.
Repeat steps 3 to 7 until the desired result is obtained.
Press [Return] to return to the [Printer Adjustment Menu] screen.