
Custom Screen: Selecting the Screen Type
Select a screen type to be used for Screen 1, Screen 2, and Stochastic, respectively.
Stochastic, however, is always available.
The screen types have the following features. Use this information as a guide to select an appropriate one.
Screen 1, Screen 2
Type | Description |
|---|---|
Line 200 | Uses fine lines to reproduce an image. Suitable for office documents including graphs. |
Line 180 | Uses lines to reproduce an image. Suitable for office documents. |
Line 150 | Uses lines to reproduce an image. Suitable for black-and-white printing. |
Dot 270 | Uses ultrafine dots to reproduce an image. Suitable for office documents including graphs and small texts. |
Dot 210 | Uses ultrafine dots to reproduce an image. Suitable for office documents including graphs and small texts. |
Dot 190 | Uses fine lines to reproduce an image. Suitable for printing catalogs. |
Dot 175 | Uses dots to reproduce an image. Suitable for printing color photos. |
Dot 150 | Uses coarse dots to reproduce an image. Suitable for black-and-white printing. |
Dot 130 | Uses coarse dots to reproduce an image. Suitable for printing posters. |
Stochastic
Type | Description |
|---|---|
FM 1 | Uses aperiodic dots to reproduce an image. Suitable for printing maps, photos of clothes or textiles finely designed. |
FM 2 | Uses aperiodic dots to reproduce an image. Approximately 250 lines or equivalent are used, focusing on the color stability. Suitable for printing photos of clothes or fine-design textiles in larger sizes. |
FM 3 | Uses aperiodic dots to reproduce an image. An image is reproduced with approximately 200 lines or equivalent, focusing color stability and granularity. Suitable for printing photos of clothes or fine-design textiles in larger sizes with color stability and granularity that ensure the quality equivalent to the AM screen quality. |

For details about the adjustment after changing the screen types, refer to the following pages.
For Image Controller IC-603: "Adjustment flow when changing the screen" of Image Quality Adjustment Flow of Image Controller IC-603.
Image Controller IC-313 or Image Controller IC-417: ''Adjustment flow when changing the screen'' of Image Quality Adjustment Flow of Image Controller IC-417 or Image Controller IC-313.
Follow the procedure on Administrator Setting to display the [Administrator Setting Menu] screen.
Press [System Setting] on the [Administrator Setting Menu] screen, and then press [Expert Adjustment], [Quality Adjustment], and [Custom Screen] in sequence.
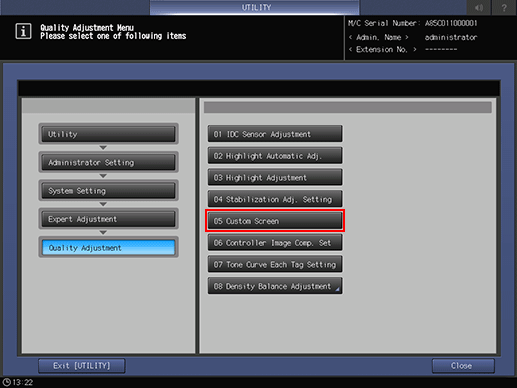
The [Custom Screen Pattern] screen is displayed.
Select the screen type according to what to print.
Dot 120 is recommended for the Screen 1. We recommended to use Screen1 for usual operation. If necessary, specify the screen setting to Screen 2 or Stochastic according to your printing task.
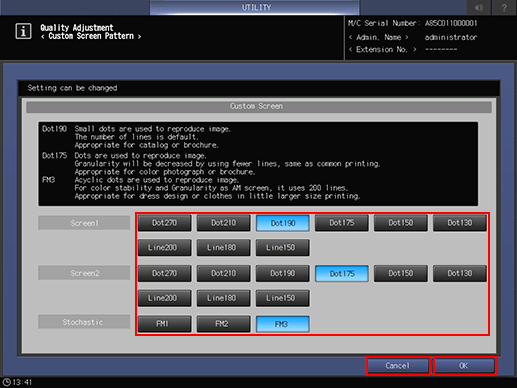
Press [OK] to complete the setting.
To cancel the change, press [Cancel]. In either case, the screen returns to the [Quality Adjustment Menu] screen.
If you have changed the screen type, press [Exit [UTILITY]] on the [Quality Adjustment Menu] screen to return to the [MACHINE] screen.
The Gamma Adjustment will start automatically.
When the Gamma Adjustment is completed, reenter the Administrator Setting mode and proceed to the Highlight Adjustment for the changed screen type.