
Tri-Fold Crease Position
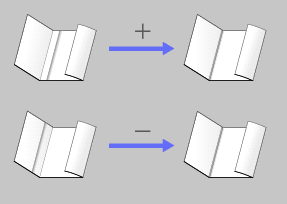
Move the tri-fold crease position in Creaser Unit CR-101 mounted on Saddle Stitcher SD-513. For both the Fold 1 crease position and the Fold 2 crease position, adjust the distance from the paper edge to the crease position.
Objects of Adjustment: Offset for All Size, A4  , 8.5
, 8.5  11
11

If a numeric value is specified for [Offset for All Size], it is applied to all paper sizes. With a specific paper size selected,the set value becomes the sum of the entered value and the value previously specified for [Offset for All Size].
Make this adjustment after completing [Tri-Fold Position Adj.].
Even once the crease position is adjusted, a misalignment may be caused between the folding position and crease position depending on the paper weight. In this case, retry this adjustment so that the folding position matches the crease position.
Any crease position causes the tri-fold position to be pulled to the crease position, and the fold position may be changed.
In this case, make the [Tri-Fold Position Adj.] to determine the tri-fold position, then follow the steps below to adjust the crease position.
1. Largely shift the crease position from the tri-fold position. Shift the crease position in the negative (-) direction or positive (+) direction so that each current position shifts at a maximum when outputting paper.
2. Check the output paper, then measure the distance from the crease position on the output paper to the desired crease position.
3. Enter the measurement distance above into the setting value of Crease Position Adjustment.
For details on the setting procedure, refer to the following.
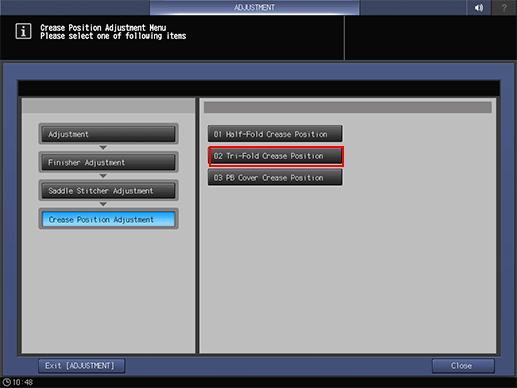
Press [Adjustment] on the [MACHINE] screen to display the [Adjustment Menu] screen.
Press [Finisher Adjustment], [Saddle Stitcher Adjustment], [Crease Position Adjustment], and [Tri-Fold Crease Position] in sequence.
Select the size to be adjusted.

Press [Print Mode].
Load the paper with the size to be adjusted, then select that tray.
Press Start on the control panel.
A sample pattern will be output.
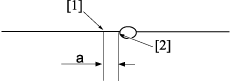
Measure misalignment a between the folding line on the output paper and crease positions.
Allowance: a = ± 1 mm or less
[1] Folding line [2] Crease edge
If any adjustment is required, press [Exit PrintMode] to return to the [Tri-Fold Crease Position Adjustment] screen.
Select [Fold 1], and then use the touch panel keypad to enter the set value.
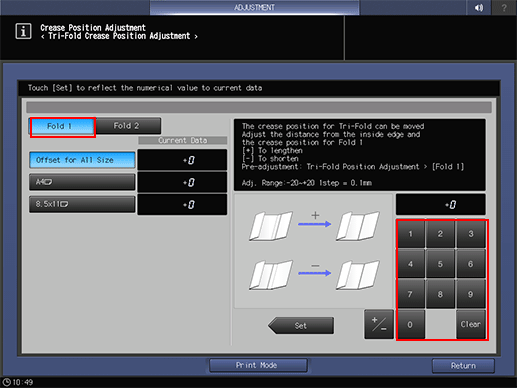
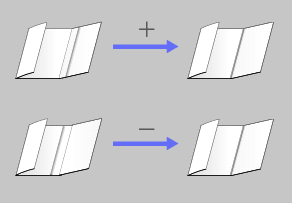
Use [+/-] to specify the value to be positive or negative.
Press [Set] to change the Current Value.
Adjustment Range ([Fold 1]): -20 ([To shorten]) to +20 ([To lengthen]) (1 step = 0.1 mm)
Adjust the length from the inside edge to the Fold 1 crease position.
Select [Fold 2], and then use the touch panel keypad to enter the set value.
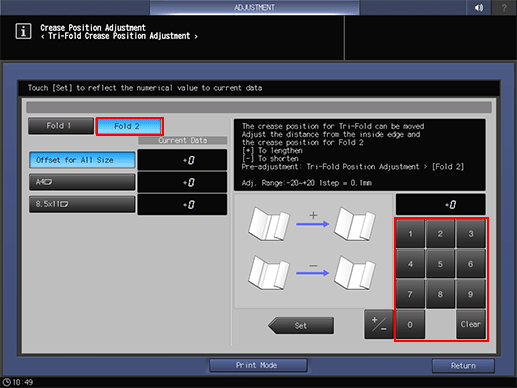
Use [+/-] to specify the value to be positive or negative.
Press [Set] to change the Current Value.
Adjustment Range ([Fold 2]): -20 ([To shorten]) to +20 ([To lengthen]) (1 step = 0.1 mm)
Adjust the length from the inside edge to the Fold 2 crease position.
Repeat steps 4 to 10 until the desired result is obtained.
Press [Return].
The screen returns to the [Crease Position Adjustment Menu] screen.