
Scan Calibration: Calibrating Scanner
This screen is displayed if you select [Scan calibration] in the [Controller Machine Setting Menu] screen. For details about how to display the [Controller Machine Setting Menu] screen, refer to CONTROLLER: Setting the Controller.
Name | Description |
|---|---|
[Paper Size] | Press [Change] to specify the paper size. |
[Paper Tray] | Press [Change] to specify the paper tray. |
[Sets] | Press [Change] to specify the copy count. |
[Screen Type] | Press [Change] to specify the screen type. |
[Auto Gamma Adjustment] | Sets whether to perform the gamma automatic adjustment. To perform the automatic adjustment, specify [On], or select [Off] if not. |
[Print Chart] | Outputs a chart for executing calibration. |
[Scan] | Executes calibration using the scanner of the machine. |
Executing Scan Calibration
Execute calibration using the scanner of the machine.

If the calibration data has been registered by Color Centro, all calibration data will be cleared. Keep that in mind when executing scan calibration.
Enter 8-digit password and then press [OK].
The administrator password consists of 8 alphanumeric characters.
The default password is "00000000." If you cannot log in with the default password, contact the administrator.
Display the [Scan calibration] screen.
Press [Change] of [Paper Size] and select a paper size, and then press [OK].
You can select any of [A4], [8.5
 11], [A3] and [11 17].
Select a paper size according to the setting in Utility/Counter - [Administrator Setting] - [System Setting] - [Size Setting] - [Detect Original Size on Original Glass].
Press [Change] of the [Paper Tray] and select a paper tray, and then press [OK].
You can select any of [Tray 1] to [Tray 5], and [Bypass].
Press [Change] of the [Sets] and enter copy count, and then press [OK].
You can specify up to 99 counts.
Press [Change] of the Screen Type and select a screen type, and then press [OK].
You can select any of the [Screen 1], [Screen 2], and [Stochastic].
To perform the Auto Gamma Adjustment, press [On], or select [Off] if not.
Press [Print Chart].
Chart printing is executed.
Press [Close].
Press [SCAN] tab.
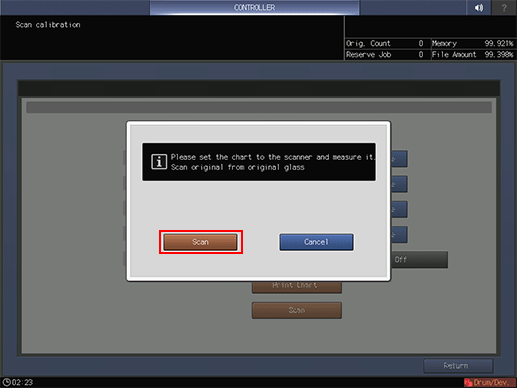
Set the printed chart on the original glass, and press [Scan].
Set the chart on the original glass so that "This side is FRONT!" shown on the chart is in the near side and "This side is REAR!" is in the back.
When the calibration is completed, press [Close].