
Both Sides Adjust: Adjusting the Image Shift
If there is misalignment on the front/back side, you can move the whole print area to adjust it.
As an example, how to adjust the print position if it is misaligned downward (in the Y direction) by 3 mm and to the right (in the A direction) by 3 mm on the back side is explained below.
• Meaning and Purpose of Image Shift Adjustment
When the print image on the front and/or back side of the print is not in its desired position, this function allows you to horizontally/vertically move the whole print area by specifying the desired values. Make the adjustment for each paper type.
Adjustable range with this setting

• When to perform
When the printing position on the front/back side of a print is misaligned from the desired location
•Intended Environment
Image Controller | Image Controller IC-603 |
* The sample screen may be different from the actual display depending on your system environment.
•Precautions
Set the Image Shift adjustment for each paper type. It is recommended that the adjustment setting be saved as a paper profile. (Refer to Registering Paper Profile (Paper Catalog).)
If the Image Shift adjustment does not solve the misalignment, adjust the horizontal/vertical magnification. (Refer to Both Sides Adjust: Adjusting the Horizontal/Vertical Magnification.)
Print the original and measure the misalignment on the front and back sides using a scale magnifier.
Each page of the sample pdf document has register marks (+ marks) printed on the front and back sides.
As an example, how to adjust the print position if it is misaligned downward (in the Y direction) by 3 mm and to the right (in the A direction) by 3 mm on the back side is explained below.
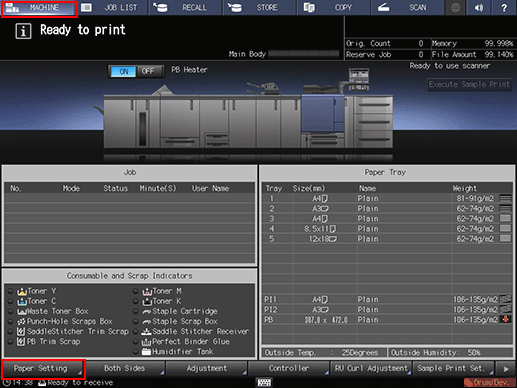
On the touch panel of the main body, press [Paper Setting] on the [MACHINE] screen.
You can also press [Paper Setting] on the [COPY] screen to reach the same screen.
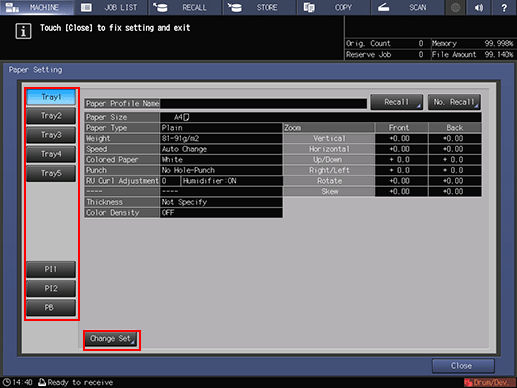
Select the tray in which the papers are loaded and press [Change Set].
Example: [Tray 1] is selected.
On the [Change IndividualSet] screen, press [Both Sides Adj.].
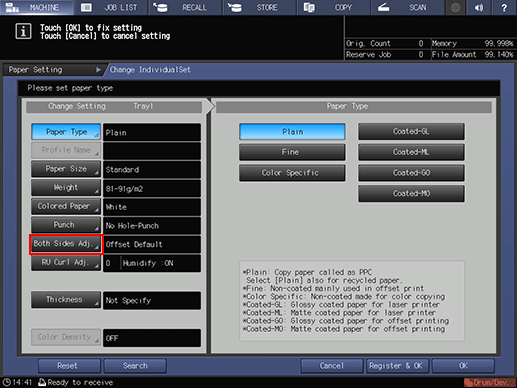
You can also press [Both Sides] on the [MACHINE] screen and select a tray on the left side.
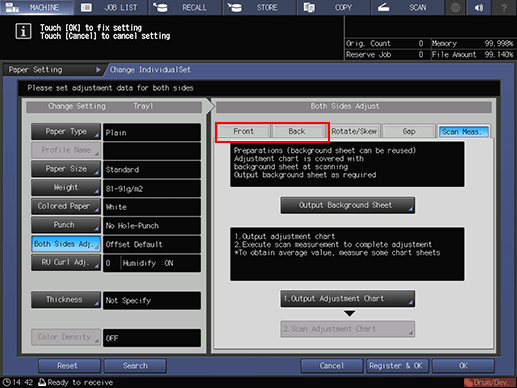
Select the side to adjust by pressing [Front] or [Back].
Example: [Back] is selected for Image Shift adjustment. To adjust the front side, press [Front].
Press [Up/Down] and/or [Right/Left] to enter the adjustment value in [Image Shift]. When the adjustment is completed, press [OK].
Example: Set the items as below when shifting 3 mm upward and 3 mm toward the left.
Item
Setting
[Up/Down]
Shifting 3 mm upward (+30)
Press [Up/Down], [3], and [0] to enter [+3.0 mm]. This makes the print image move 3 mm upward on the back side.
[Right/Left]
Shifting 3 mm to the left (-30)
Press [Right/Left], [+/-], [3], and [0] to enter [-3.0 mm]. This makes the print image move 3 mm toward the left on the back side.
After adjusting the settings, press [OK].
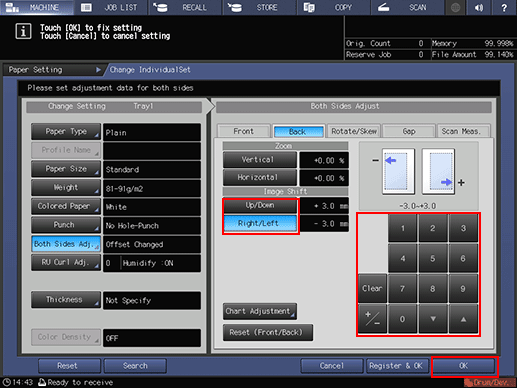
Press the keypad on the screen to set the value.
Use [+/-] to specify the value to be positive or negative.
The values are in 0.1 mm increments. (1 = 0.1 mm)
Press [
 ] to increment the value and [
 ] to decrement the value.
Print the original again and check the print position.
Repeat the above steps until the desired print positions on the front and back sides are obtained.


As a general rule, set the Image Shift adjustment setting for each paper type. It is recommended that frequently used paper settings be saved as a paper profile. (Refer to Registering Paper Profile (Paper Catalog)Registering Paper Profile (Paper Catalog).)
For more efficient Image Shift adjustment, first set one of the four corner register marks, and then align the rest.
If the Image Shift adjustment does not provide the desired alignment, adjust the horizontal/vertical magnification. (Refer to Both Sides Adjust: Adjusting the Horizontal/Vertical Magnification.)