
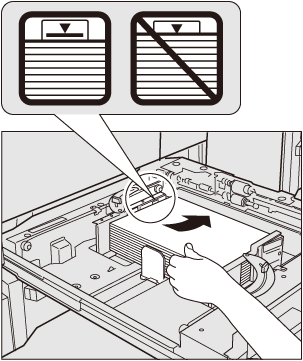
Replenishing the Main Body Trays with Paper
To use paper other than loaded in a tray, change the setting of that tray in [Paper Setting] from the [MACHINE] screen or [COPY] screen.
Withdraw the tray to be replenished with paper, and then open the feed roller.
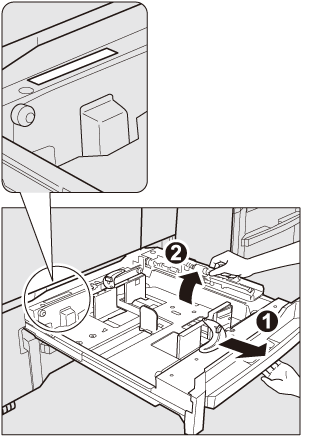

Be sure to fully withdraw the tray until a blue label shows on the rear-left side of the tray. Otherwise, the feed roller may not open or other machine trouble may be caused.
To load the same size as loaded before, proceed to step 5.
To load a different size of paper, proceed to step 2.
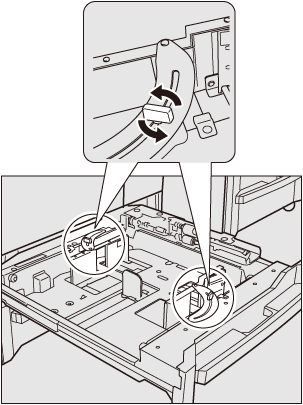
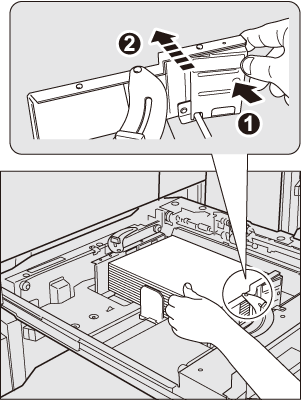
Turn the guide fixing knobs(2 pieces on front and rear side) counterclockwise to loosen them.
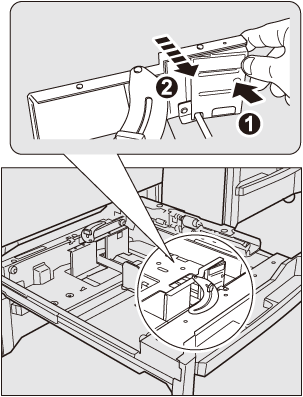
While pushing the side guide lock release lever, slide the side guide plate outward.
Use the size indication on the bottom plate of the tray to determine the position.
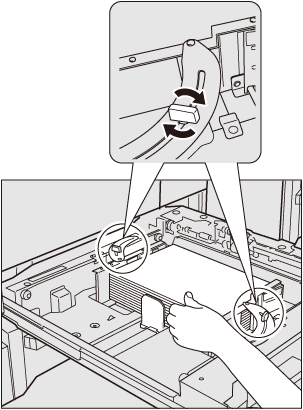
Slide the rear guide plate outward.
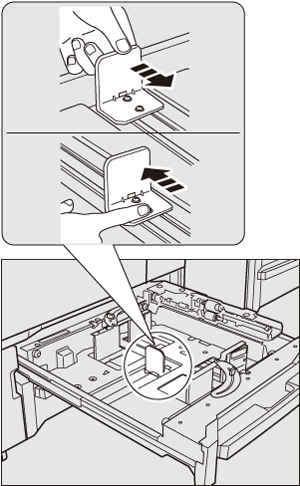
To slide the rear guide plate to the right, hold the top as illustrated, and slide the rear guide plate while pressing it down slightly.
On the other hand, hold and slightly press down the bottom of the rear guide plate to slide the rear guide plate to the left.
The rear guide plate cannot be slid smoothly to the right side without being pressed down. Also, holding the rear guide plate at the top may fail to slide it to the left side.
Be careful not to move the rear guide plate by force, otherwise it may be damaged.
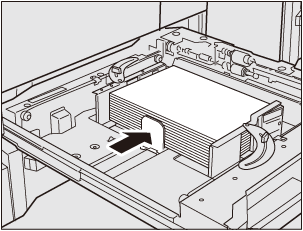
Load paper so that the stack of paer is aligned against the right side of the tray.
Load paper with the print side down.
Do not load more than 500 sheets (80 g/m2 / 21 lb Bond) in tray 1 (upper tray), or more than 1000 sheets (80 g/m2 / 21 lb Bond) in tray 2 (lower tray). Also, do not load paper above the limit indicated on the side guide plate. Otherwise, a paper jam may be caused. Forcibly pushing the tray into the main body with paper loaded close to the limit may misalign the paper stack. Gently push the tray into the main body.
Pushing the side guide lock release lever, align the side guide plate to the paper.
Turn the guide fixing knobs(2 pieces on front and rear side) clockwise to fix them.
Align the rear guide plate to the paper.
Be sure that the rear guide plate is securely aligned to the paper. If any gap is left between the rear guide plate and paper, the machine cannot detect the correct paper size, and machine trouble may be caused.
Push in the tray until it locks into place.
The Amount indicator of the tray will change from
 to
to  on the [MACHINE] screen and [COPY] screen.