
Using a Computer to Print an HDD Saved Job
You can print an HDD saved job using Job Centro.
Start Job Centro and log in to the machine. (Refer to Starting Job Centro.)
The [Job Centro] screen is displayed.
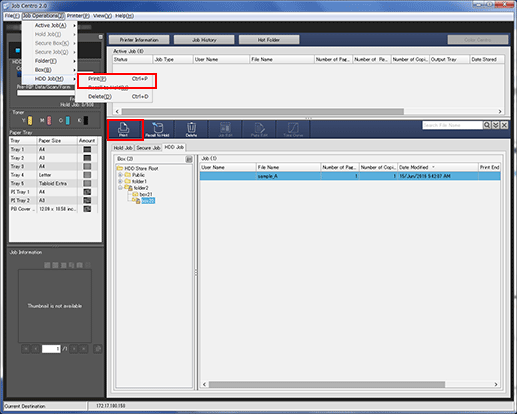
Click the [HDD Job] tab and select the job to be printed.
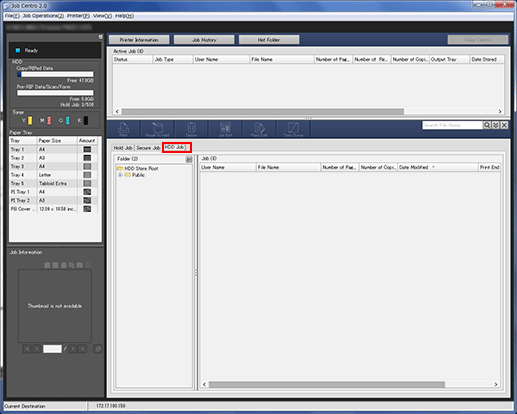
When the target job is in the same level as for [HDD Store Root], select any job from the job list on the right that is displayed by selecting [HDD Store Root] in the tree of the [Select Folder] screen.
Folder
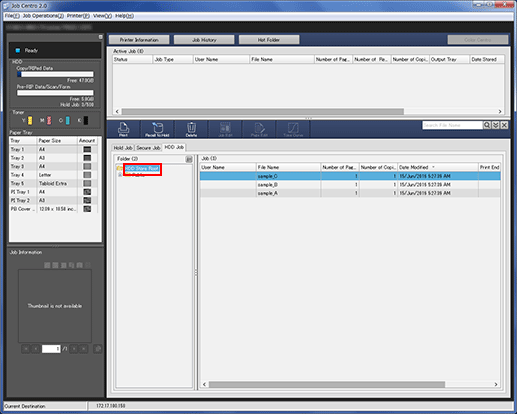
When the target job is in [Public] (level 2), select any job from the job list on the right that is displayed by selecting [Public] in the tree of the [Select Folder] screen.

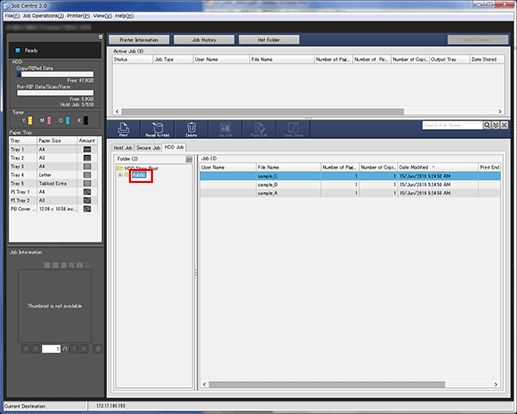
When the target job is in a folder (level 2), select any job from the job list on the right that is displayed by selecting a folder in the tree of the [Select Folder] screen.
When you select a Folder with a specified password , the [Folder Password] screen is displayed.

Enter the password, then select any job from the job list on the right that is displayed. The folder with the password specified is indicated by the lock mark (
 ).
).
Box
When the target job is in a level under [Public] (level 3), select the Box that is displayed by selecting [Public] in the tree of the [Select Folder] screen. Select any job from the job list on the right.

When you select a Box with a specified password, the [Box Password] screen is displayed.

Enter the password, then select any job from the job list on the right that is displayed. The Box with a specified password is indicated by the lock mark (
).
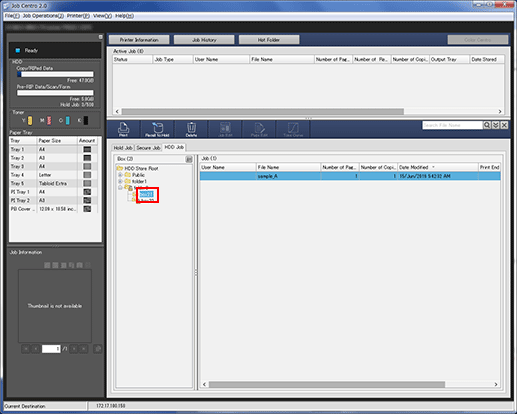
When the target job is in a Box (level 3), select any job from the job list on the right that is displayed by selecting a Box in the tree of the [Select Folder] screen.
When you select a Box with a specified password, the [Box Password] screen is displayed.
Enter the password, then select any job from the job list on the right that is displayed. The Box with the password specified is indicated by the lock mark (
).
Click [Print].
You can alternately click [HDD Job] - [Print] in the [Job Operations] menu.
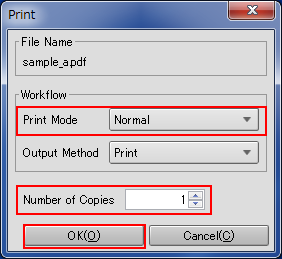
Select [Print Mode] on the [Print] screen, enter [Number of Copies], then click [OK].
[Normal]: Prints data by the number of sets that is specified for the job.
[Proof]: Prints data by only one set to check the output.
[Proof (1st Sheet)]: Prints only the first page to check the output.
[Wait]: Sets the job to the output stop state as a reserved job.
If multiple jobs are selected in step 2, data is printed by one set. Multiple sets cannot be output.

Tips:
You can also use the following functions.
Change the priority of job output in Job Centro.
Check the job output history in Job Centro.