
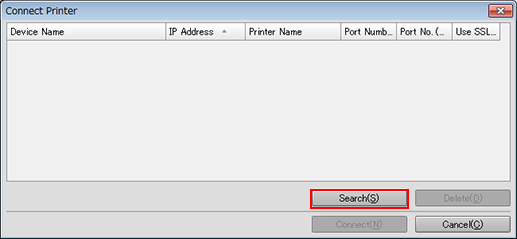
[Connect Printer] Screen
On the [Connect Printer] screen, you can select a printer to be connected.

Name | Description |
|---|---|
Printer list | Displays the printers available for connection. For details, refer to About Printer List. |
[Search] | Searches for the target printer. For details, refer to Add to Printer List. |
[Delete] | Deletes a printer from the list. For details, refer to Deleting from Printer List. |
[Connect] | Connects to the selected printer. |
[Cancel] | Does not perform login operation, and Job Centro does not start. |
About Printer List
The printer list displays the following items. Up to 50 items can be displayed.
Name | Description |
|---|---|
[Device Name] | The device name of the registered printer. |
[IP Address] | The IP address of the registered printer. |
[Printer Name] | The printer name of the registered printer. |
[Port number] | The port number of the registered printer. |
[Port No. (SSL/TLS)] | The port number (SSL/TLS) of the registered printer. |
[Use SSL/TLS] | Select this check box to toggle whether to use SSL/TLS between ON and OFF. |
To adjust the display width of the column, double-click on the boundary between items on the item bar. The display width of the column is automatically adjusted according to the longer character strings: the strings of the item name or the strings of the item in the list.
To sort the data by item, click the header of the column. You can switch between ascending order and descending order by clicking.
Add to Printer List
Add a printer to the printer list on the [Connect Printer] screen.
On the [Connect Printer] screen, click [Search].
The [Search Printers] screen is displayed.
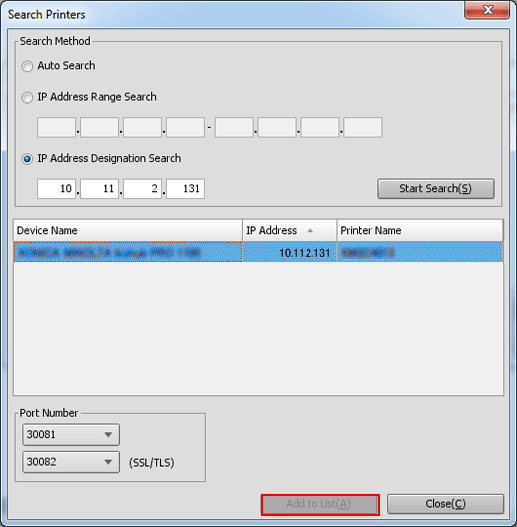
Select [Auto Search], [IP Address Range Search], or [IP Address Designation Search].
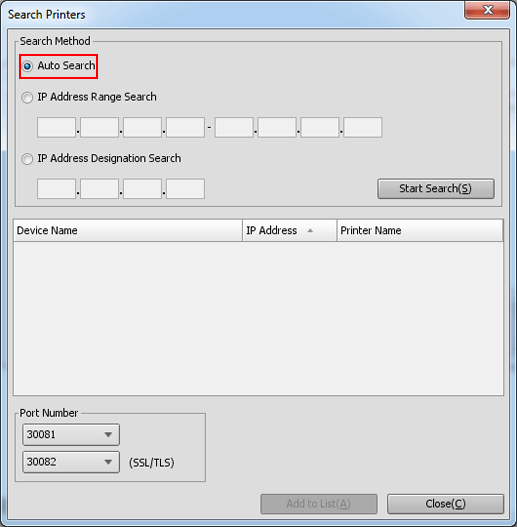
If selecting [Auto Search], you can search for the printer corresponding to Job Centro within the same subnet mask.
If selecting [IP Address Range Search] or [IP Address Designation Search], enter the IP address.
Click [Start Search].
The printers meeting the search condition are listed.
Select the printer to be added on the [Connect Printer] screen, and click [Add to List].
Up to 50 printers can be added to the list.
Click [Close]
The screen returns to the [Connect Printer] screen.
Deleting from Printer List
Delete a desired printer from the printer list on the [Connect Printer] screen.
Select the printer from the printer list on the [Connect Printer] screen.
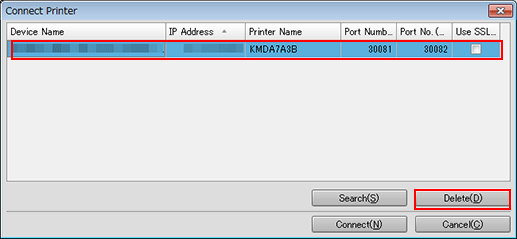
Click [Delete].
The [Delete] screen is displayed.
Click [OK].
The selected printer is deleted from the list.