
Direct Print Setting
Click [Direct Print Setting] on the menu of [Print Setting] tab to display this screen.
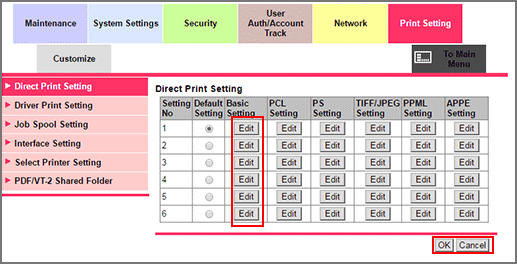
The following settings are supposed to be a set, and up to six sets can be specified. Select one from these six sets for each RAW port in [Select Printer Setting]. If you use a port other than that set in [Select Printer Setting] without any instruction from the driver during printing, the setting specified as the default by a radio button in the [Default Setting] is reflected on the printing.
Item | Description |
|---|---|
[Basic Setting] | Make the basic settings for printing. For details, refer to Basic Setting. |
[PCL Setting] | Make the settings on PCL printing. For details, refer to PCL Setting. |
[PS Setting] | Specify whether to print error information when an error occurs during PS rasterization. For details, refer to PS Setting. |
[TIFF/JPEG Setting] | Make the settings on TIFF/JPEG printing. For details, refer to TIFF/JPEG Setting. |
[PPML Setting] | Make the settings on PPML printing. For details, refer to PPML Setting. |
[APPE Setting] | Make the settings on APPE printing. For details, refer to APPE Setting. |

The Upgrade Kit UK-104 and Upgrade Kit UK-214 are required to display [APPE Setting].
Basic Setting
This setting can be made also from [Controller] on the [MACHINE] screen. For details about the setting, refer to Basic Settings: Registering Direct Print Initial Settings.
Click [Edit] in the [Basic Setting] column.
Select a desired option from the drop-down list provided for each setting item. Click each field that requires entry, and enter a value.
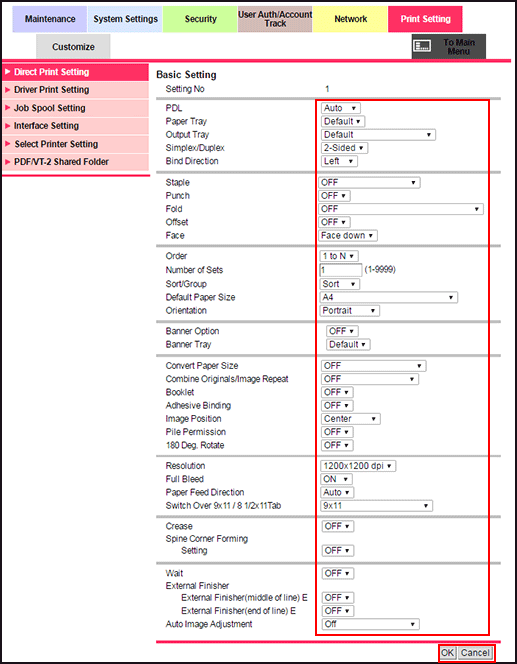
Click [OK]. Clicking [Cancel] cancels the setting.
Click [OK] on the setting complete screen.
PCL Setting
This setting can be made also from [Controller] on the [MACHINE] screen. For details about the setting, refer to PCL Setting: Registering PCL Default Settings.
Click [Edit] in the [PCL Setting] column.
Select a font symbol set from the drop down list of [Symbol Set].
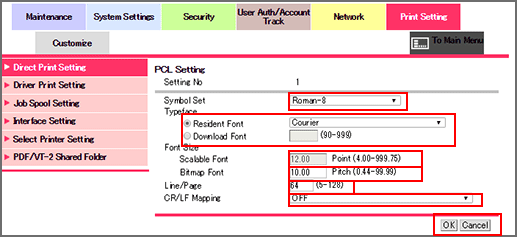
Select either embedded fonts ([Resident Font]) or downloaded fonts ([Download Font]) for [Typeface]. When selecting [Resident Font], select the desired font from the drop down list. When selecting [Download Font], specify the number of the desired downloaded font.
Enter the size of scalable font (4.00 pt to 999.75 pt) in the [Scalable Font] text box.
Enter the size of bitmap font (0.44 pitch to 99.99 pitch) in the [Bitmap Font] text box.
Enter the lines per page (5 to 128) in the [Line/Page] text box.
Using the [CR/LF Mapping] drop down list, specify how to manage the replacement of CR (carriage return) and LF (line feed) in text data.
Click [OK]. Clicking [Cancel] cancels the setting.
Click [OK] on the setting complete screen.
PS Setting
This setting can be made also from [Controller] on the [MACHINE] screen. For details about the setting, refer to PS Setting: Registering PS Default Settings.
Click [Edit] in the [PS Setting] column.
Select either [ON] or [OFF] in the [PS Error Print] drop-down list, and select either [ON] or [OFF] in the [Grayscale OverPrint] drop-down list.
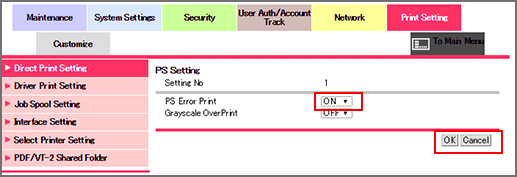
Click [OK]. Clicking [Cancel] cancels the setting.
Click [OK] on the setting complete screen.
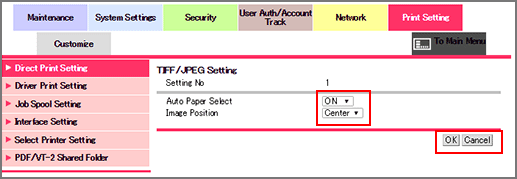
TIFF/JPEG Setting
This setting can be made also from [Controller] on the [MACHINE] screen. For details about the setting, refer to TIFF/JPEG Setting: Specifying Printing Methods of TIFF/JPEG Images.
Click [Edit] in the [TIFF/JPEG Setting] column.
Select either [ON] or [OFF] in the [Auto Paper Select] drop-down list, and select either [Left] or [Center] in the [Image Position] drop-down list.
For details about each item, refer to TIFF/JPEG Setting: Specifying Printing Methods of TIFF/JPEG Images.
Click [OK]. Clicking [Cancel] cancels the setting.
Click [OK] on the setting complete screen.
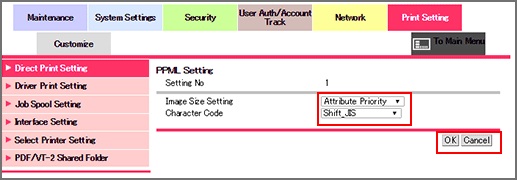
PPML Setting
This setting can be made also from [Controller] on the [MACHINE] screen. For details about the setting, refer to PPML Setting: Registering PPML Default Settings.
Click [Edit] in the [PPML Setting] column.
Select either [Resolution Priority] or [Attribute Priority] from the [Image Size Setting] drop-down list. Select [Shift_JIS], [windows-1252], [x-mswin-936], [x-windows-949], or [x-MS950-HKSCS] from the [Character Code] drop-down list.
For details about each item, refer to PPML Setting: Registering PPML Default Settings.
Click [OK]. Clicking [Cancel] cancels the setting.
Click [OK] on the setting complete screen.
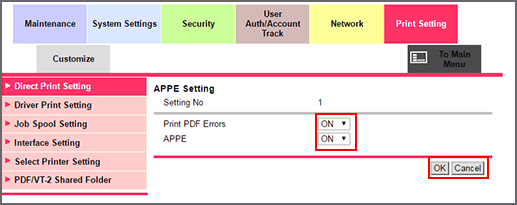
APPE Setting
This setting can be made also from [Controller] on the [MACHINE] screen. For details about the setting, refer to APPE Setting: Setting APPE (Adobe PDF Print Engine).
Click [Edit] in the [APPE Setting].
Select either [ON] or [OFF] in the [Print PDF Errors] drop-down list, and select either [ON] or [OFF] in the [APPE] drop-down list.
For details on each item, refer to APPE Setting: Setting APPE (Adobe PDF Print Engine).
Click [OK]. Clicking [Cancel] cancels the setting.
Click [OK] on the setting complete screen.