
Program Job: Collectively Outputting Multiple Copy Jobs
Merge multiple copy jobs scanned with different settings, and output them as a single job.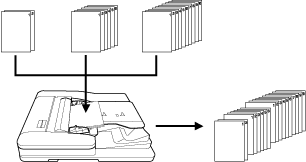
When configuring program job settings, be sure to note the following points.
Separate Scan mode is automatically selected.
A paper tray can be specified for each job, so the paper size can be changed for each job.
Stapling in output mode can be set to all jobs or each scanned job.
Punching in output mode applies the same setting to all jobs.
Punching in output mode cannot be specified for each job, however, you can print out data with punching or no punching specified by setting [Pre-Punched] in [Paper Setting] for the tray in which punched sheets are loaded, and specifying a paper tray for each job.
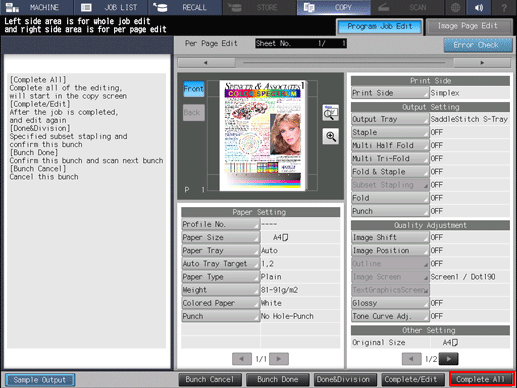
If you want to change the output mode or the number of copies after scanning has been completed, press Setting on the control panel to display the [Program Job Edit] screen.
An unlimited number of jobs can be specified to be scanned. However, up to 10,000 pages can be scanned.
A program job cannot be registered in [Copy Program].
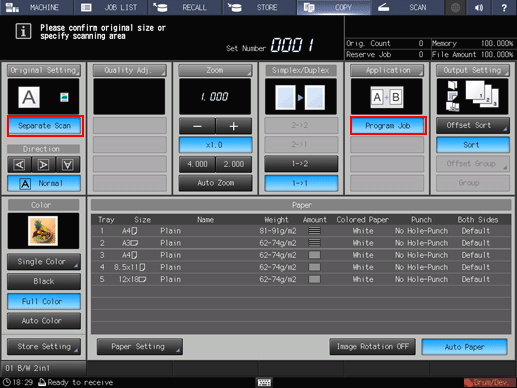
Press [Application] on the [COPY] screen.
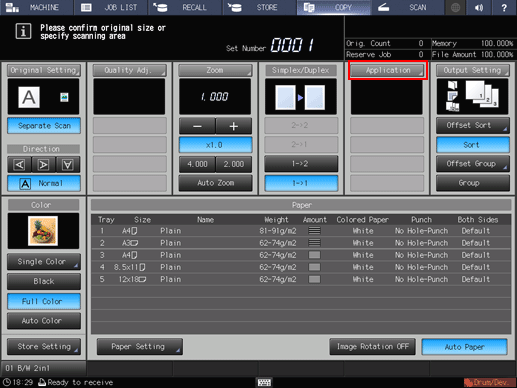
The [Application] screen is displayed.
Press [Program Job].
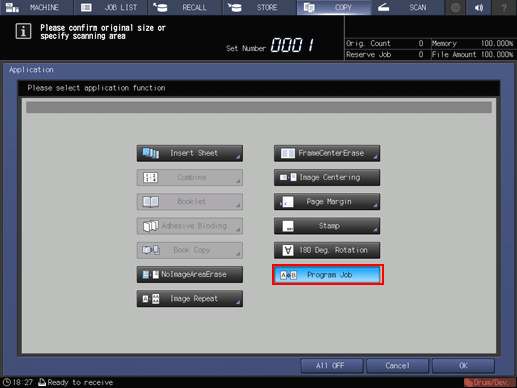
The incompatible function keys will be dimmed to show inactivity.
Press [OK] to return to the [COPY] screen.
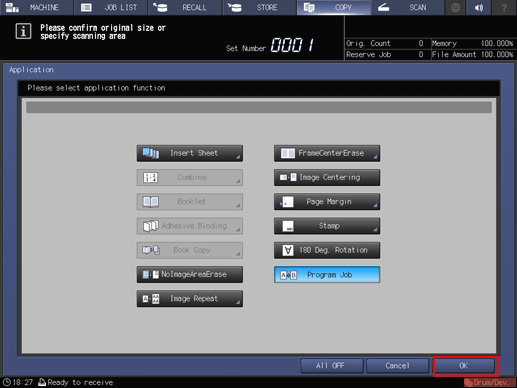
The [Program Job] icon and shortcut key are displayed under [Application] on the [COPY] screen. Also, [Separate Scan] is automatically selected.
Position the original.
Press Start on the control panel.
The original is scanned. After scanning has been completed, the [Program Job Edit] screen is displayed.
Specify copy conditions as needed.
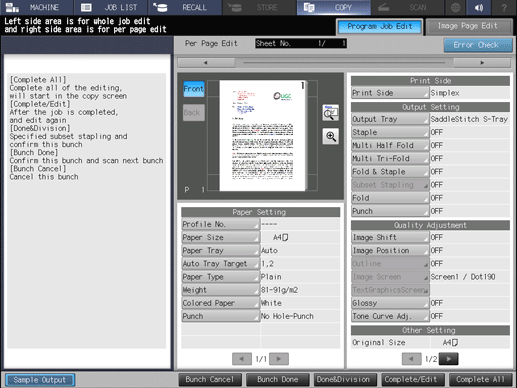
The specifiable copy conditions are [Paper Setting], [Print Side], [Output Setting], and [Quality Adjustment].
For details about the setting procedure, refer to Job Ticket Edit Screen.
Press [Bunch Done] or [Done&Division].
[Bunch Done]: Merges scanned jobs and sets them as a single job.
[Done&Division]: Press this button to set stapling to each job. The jobs processed by subset stapling are merged as a single job.
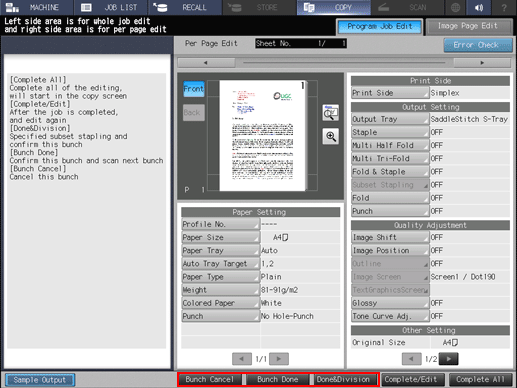
Pressing [Bunch Cancel] cancels all the scanned jobs and returns to the [COPY] screen.
Repeat steps 4 to 7 to scan all the original pages.
After the last original page has been scanned, press [Complete All]. Print-out starts.
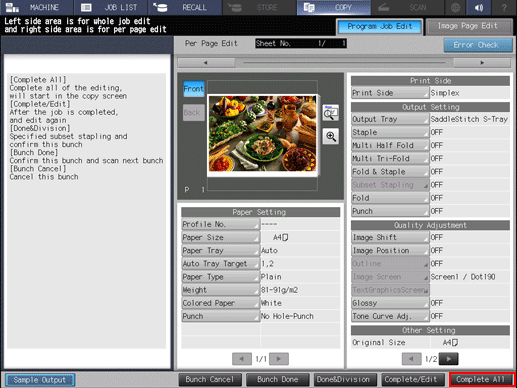
If you want to change any copy condition after all jobs have been merged, press [Complete/Edit] to display the [Program Job Edit] screen shown below. After a change has been made, press [Complete All].

If you have pressed [Bunch Done] or [Done&Division] without pressing [Complete All] or pressed [Bunch Done]on the [Program Job Edit] displayed by pressing [Complete/Edit] after the last original page has been scanned, press the Setting on the control panel to return to the [Program Job Edit] screen. Press [Complete All] to output data.