
Periodical Adjustment (Automatic Adjustment): Setting Color Density Control Automatically
For periodical adjustment (automatic adjustment), the following settings are required:
[Adjustment Execution Timing]: Select [During Job Runs] to perform adjustment even when a job is running or [Before Job Start] to only perform adjustment before a job starts. For details, refer to Step 6.
[Chart Tray Setting]: When selecting a tray to feed paper for output charts, select [ON], and then set the tray.
[Switch Color(1st or 2nd)]: Select the target color (1st color only, both 1st color and 2nd color) for adjustment.
[Adjustment Interval]: When specifying the adjustment interval, select [ON], then specify the desired number of sheets between 100 and 9,999.
Color Density Control adjustment cannot be performed when outputting a list such as Job List, log report, or test chart.
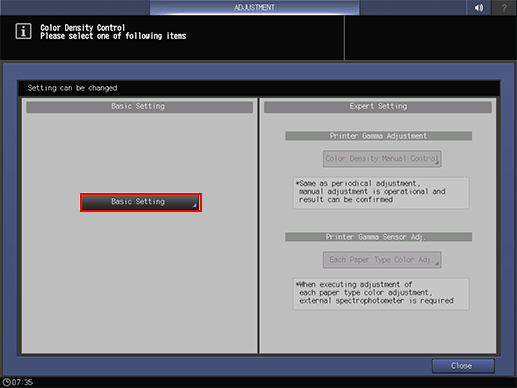
Press [Adjustment] on the [MACHINE] screen to display the [Adjustment Menu] screen.
Press [Quality Adjustment] and [Color Density Control] in sequence.
The [Color Density Control] screen is displayed.
Press [Basic Setting].
Select [ON] or [OFF] at the right of [Use Color Density Control].
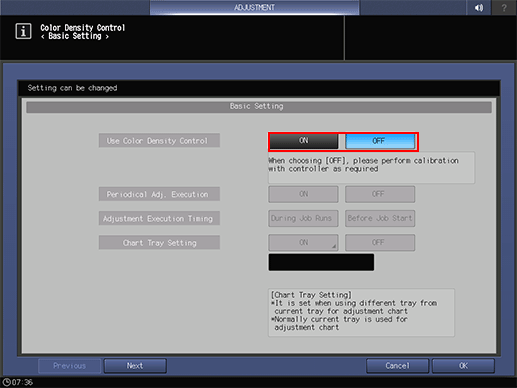
Select [ON] to make the Color Density Control adjustment. To use the IDC sensor of the machine, select [OFF].
Select [ON] or [OFF] at the right of [Periodical Adj. Execution].
To carry out Color Density Control periodically, select [ON]. If not (but adjust it manually), select [OFF]. If [ON] is selected, the machine automatically determines when to perform periodical adjustment (automatic adjustment).
If you do not select periodical adjustment (automatic adjustment), you need to carry out Color Density Control manually.
If you select to carry out periodical adjustment (automatic adjustment), you basically do not need to carry out manual adjustment. However, if you find significant fluctuation in colors for some reasons, manual adjustment may solve this problem.
If you select [ON], the color density is adjusted based on the sensor adjustment values being set by [Color Density] of [Paper Setting]. For details, refer to Paper Setting: Setting Paper for Tray.
If necessary, you can display the [Periodical Adj. Execution] on the [MACHINE] screen and select [ON] or [OFF]. For details, contact your service representative.
If you select [ON] in [Periodical Adj. Execution] in step 5, select [During Job Runs] or [Before Job Start] at the right of [Adjustment Execution Timing] to specify how periodical adjustment (automatic adjustment) is performed just when a job is running.
If [During Job Runs] is selected, adjustment is performed even when a job is running.
If [Before Job Start] is selected, adjustment is not performed when a job is running. In this case, adjustment is not performed until when the proper timing is achieved.

When Color Density Control is performed, the correction values are determined based on the combination of the following three items.
 Each paper type color adjustmentPaper typeScreen type
If any of the conditions of the three items is changed, the machine reselects a proper correction value and uses it at the timing (page) of the change.The machine may use one or more correction values for one job depending on print settings.
If the timing for periodical adjustment (automatic adjustment) is achieved when a correction value is reselected for one job, specify in [Adjustment Execution Timing] whether or not to perform the adjustment (automatic adjustment) even when a job is running.If [Before Job Start] is selected, periodical adjustment (automatic adjustment) is not performed when a job is running.
You need to perform [Color Density Manual Control] beforehand.
If you select [ON] in [Periodical Adj. Execution] in step 5, select [ON] or [OFF] at the right of [Chart Tray Setting].
To feed paper from a tray other than the currently using tray, select [ON]. To feed paper from the currently using tray, select [OFF].
If you select [OFF] and the chart-output paper size is small, the periodical adjustment (automatic adjustment) is not carried out.
If you select [ON] in [Chart Tray Setting], the paper used for output and the paper for chart must have the same characteristics.
When [During Job Runs] is selected in [Adjustment Execution Timing], adjustment is not performed while printing on the small-sized paper for copy job.
If you select [ON] in [Chart Tray Setting] in step 7, select [At All Times] or [For Small Size] at the right of [Chart Tray Condition].

To feed paper from the tray being set by [Chart Tray Select] during output of all charts for Color Density Control, select [At All Times]. To feed paper from the tray being set by [Chart Tray Select] during output of small size charts, select [For Small Size].
If you select [ON] in [Chart Tray Setting] in step 7, select a paper feed tray from the buttons on the right side of [Chart Tray Select].
Press [OK] on the [Chart Tray Setting] screen to return to the [Basic Setting] screen.
Press [Next] to select [Switch Color (1st or 2nd).]
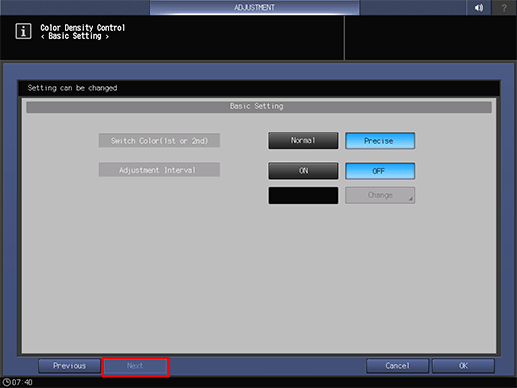
Select [Normal] to correct primary colors only. Select [Precise] to correct both primary colors and secondary colors.
If you select [ON] in [Periodical Adj. Execution] in step 5, select [ON] or [OFF] at the right of [Adjustment Interval].
If [ON] of [Adjustment Interval] is selected in step 11, press [Change] in [Adjustment Interval], then enter the adjustment interval.
Press [OK] on the [Change Adjustment Interval] screen to return to the [Basic Setting] screen.
Press [OK] to return to the [Color Density Control] screen.
Press [Close] to return to the [Quality Adjustment Menu] screen.
Checking the Adjustment Result of Color Density Control (Color Control)
You can check the adjustment result of Color Density Control (Color Control) on the screen.
The adjustment result is displayed in graph by each color of CMYK in a way to compare the target values with the measured post-correction values.
Press [Color Dens. Result] on the [MACHINE] screen.
The [Color Density Control Result] screen is displayed.
You cannot check it during a job run.
If a color problem persists even after the periodical adjustment (automatic adjustment), first perform Color Density Manual Control. If Color Density Manual Control could not solve the problem, perform Quality Adjustment. For details, refer to Pre-output Image Quality Adjustment.
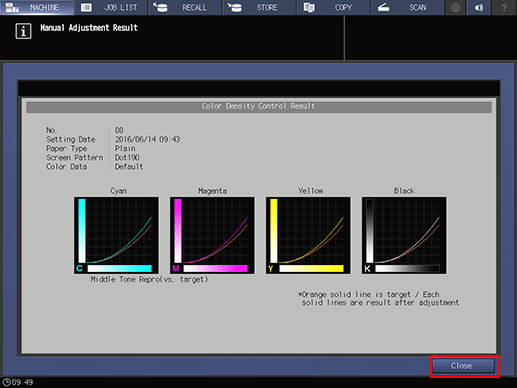
Press [Close] to return to the [MACHINE] screen.