
Manual Adjustment: Manually Performing Color Density Control
Manually perform the gamma correction using the density sensor of Relay Unit RU-509 (hereinafter, referred to as "manual adjustment"). Manual adjustment is performed when you want to update Color Density Control by optional readjustment.
In [Basic Setting], if you set [Use Color Density Control] to [ON] while [Periodical Adj. Execution] to [OFF], also perform manual adjustment as necessary before running a job. The [Switch Color(1st or 2nd)] setting in [Basic Setting] is also effective for manual adjustment. Select [Normal] to adjust primary colors only. Select [Precise] to adjust both primary colors and secondary colors.
When performing manual adjustment, select the sensor adjustment data that becomes the base of correction from the following two types.
- Sensor adjustment data that has been set as default with shipment (Default Sensor Adjustment Data)
- Sensor adjustment data that is adjusted to a particular paper type and screen (Color Sensor Adjustment Data for Each Paper Type (Registered Adj. Data))
The manual adjustment must be performed for each combination of paper type and screen type.
The screen type can be changed in UTILITY. For details, refer to Custom Screen: Selecting the Screen Type.
You can check the adjustment result on the screen.

The number of sheets output as charts is included in the print count.
Press [Adjustment] on the [MACHINE] screen to display the [Adjustment Menu] screen.
Press [Quality Adjustment] and [Color Density Control] in sequence.
The [Color Density Control] screen is displayed.
Press [Color Density Manual Control].
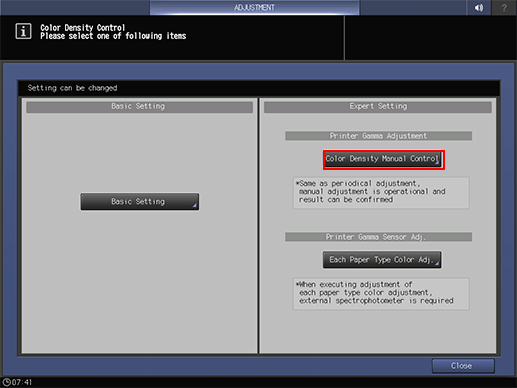
You can also display the [Color Density Manual Control] screen by pressing [Color Dens. Manual] on the [MACHINE] screen.
Press [Print Mode].
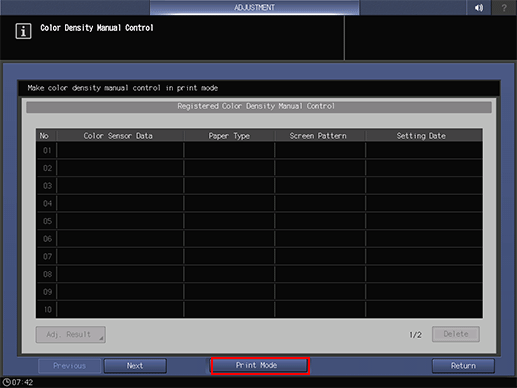

The list displayed on the [Color Density Manual Control] screen is the history of the Color Density Manual Control. To clear the history, select the desired row (data) from the list, then press [Delete]. Do not select the row (data) on the list except when deleting it or displaying [Adj. Result]. Otherwise, the [PRINT MODE] screen cannot be displayed.
Up to 15 records of the history can be registered. If all 15 registrations are already made, the oldest row (data) is overwritten.
When there is no row (data) that all of color sensor adjustment data, paper type, and screen are matched together, both Color Density Correction (Target Gamma Definition) and Color Control (Calibration) are performed and a new data is registered. When there is a row (data) that all of them are matched together, only Color Control (Calibration) is performed and the row (data) is overwritten (Setting Date is updated).
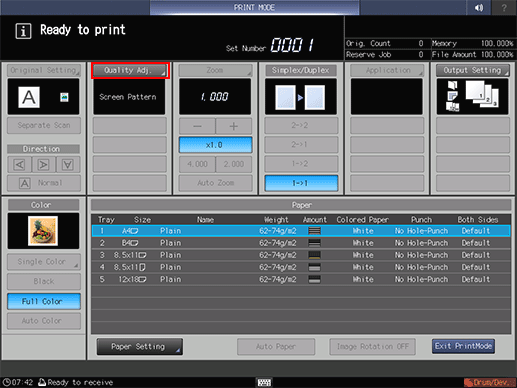
Press [Quality Adj.].
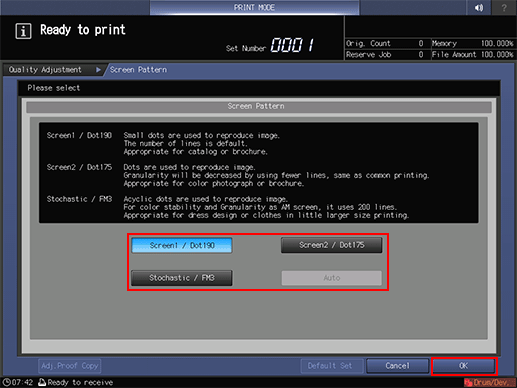
Press [
 ] on the right side of [Screen Pattern] to display the desired screen.
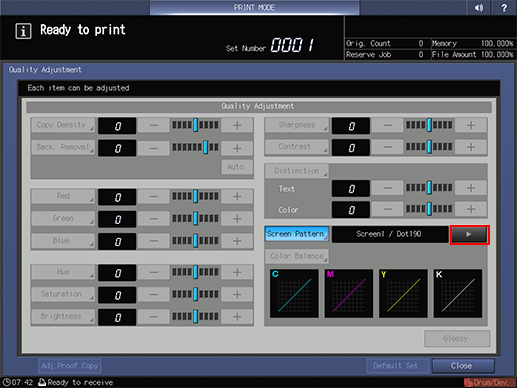
Also, you can select any desired screen after pressing [Screen Pattern] to display the [Screen Pattern] screen. Select a screen, and press [OK].
Press [Close] on the [Quality Adjustment] screen.
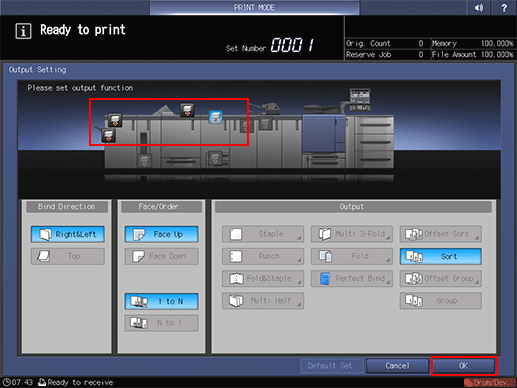
Select a tray to output the charts.
Press [Output Setting] to display the [Output Setting] screen.
Select the desired output tray by pressing its key, and press [OK].
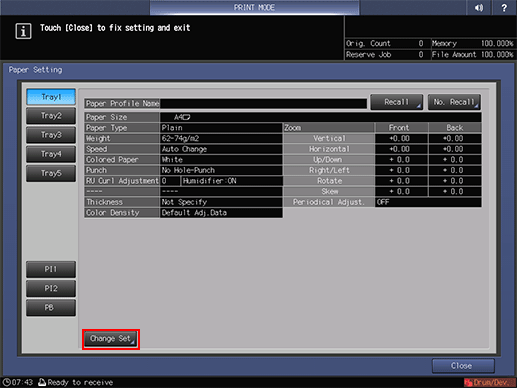
Display the [Change IndividualSet] screen.
Press [Paper Setting] on the [PRINT MODE] screen to display the [Paper Setting] screen, and then press [Change Set].
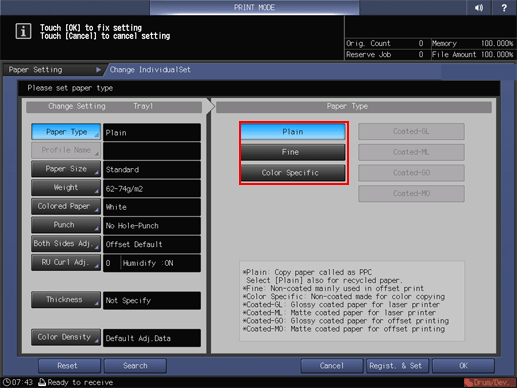
Select an output paper type.
Select sensor data for each paper type to be used for the adjustment.
Press [Color Density].
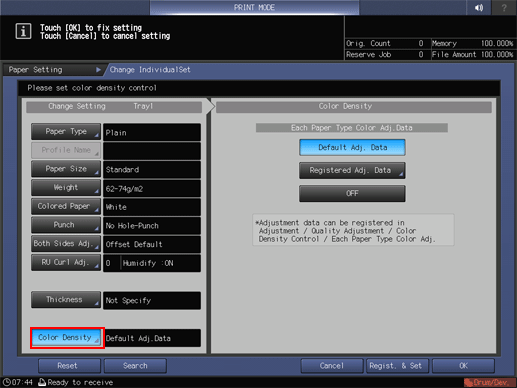
Select [Default Adj. Data] to use the default sensor adjustment data provided as factory default for correction.
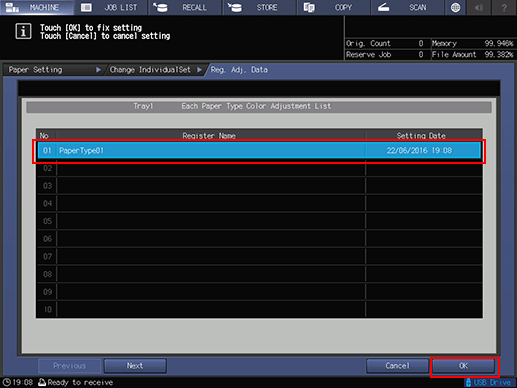
To use the color sensor adjustment data for each paper type for correction, press [Registered Adj. Data] to display the [Each Paper Type Color Adjustment List] screen and select the color sensor adjustment data for the desired paper type, and then press [OK].
When not applying Color Density Control to the selected tray, select [OFF].
The screen returns to the [PRINT MODE] screen.
Press [OK] on the [Change IndividualSet] screen to return to the [Paper Setting] screen.
Press [Close] on the [Paper Setting] screen to return to the [PRINT MODE] screen.
Press Start on the control panel.
The charts required for the adjustment is output to the tray selected in step 7.
Press [Exit PrintMode].
The screen returns to the [Color Density Manual Control] screen.
To check the adjustment result of manual adjustment on the screen, select a list (data) to be checked on the [Registered Color Density Manual Control] screen, and then press [Adj. Result].

Press [Return] to return to the [Color Density Manual Control] screen.
Press [Return].
The screen returns to the [Color Density Control] screen.
Press [Close].
The screen returns to the [Quality Adjustment Menu] screen.