User Registration: Adding, Changing, and Deleting User Registrations
Use this function to assign a number to each user, and set a User Name, User Password, E-mail Address, Account Name, Max. Allowance Set, Register Auth. Info., and Function Permission to each number.
The registered user will be listed on the screen. This list enables you to select a user to change the user data as desired, or to delete the user.
To be able to use IC cards, you need the Authentication Unit AU-201S and a setup by a service engineer. Contact your service representative.
You must also set the [IC Card Type] and [Operation Setting] for each IC card and register the IC card for each user. For details, refer to Authenticating with IC Card.
Follow the procedure on Administrator Setting to display the [Administrator Setting Menu] screen.
Press [User Auth./Account Track] on the [Administrator Setting Menu] screen, and then press [User Authentication Setting] and [User Registration] in sequence.
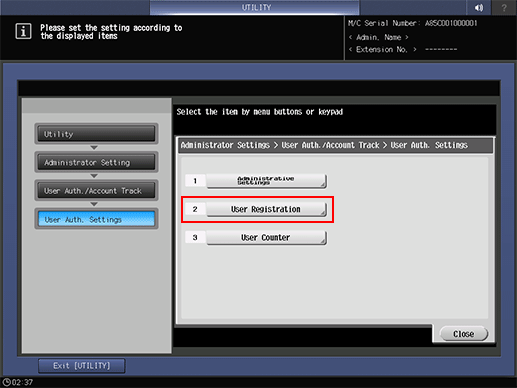
The [User Registration] screen is displayed.
Follow the instructions below to add, change or delete the user data.
Select the unregistered User No. button, and press [Edit].
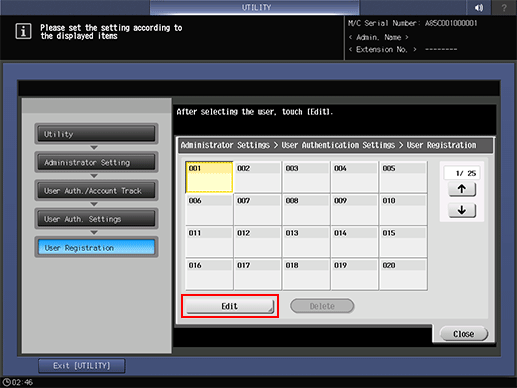
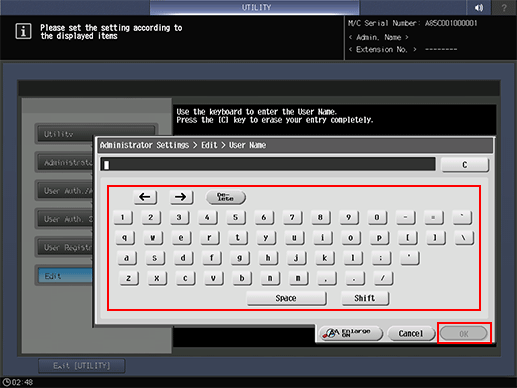
Press [User Name] and [User Password] to specify the user name and password.
When you press the [User Name], the [User Name] screen is displayed. Enter any user name, and press [OK]. You can enter up to 64 one-byte characters (32 two-byte characters) for the user name.
Press [User Password] to display the [Password] screen. Enter any desired password. Press [Password Input Confirmation] , enter the same password again, and press [OK]. You can enter up to 64 one-byte characters for the user password.
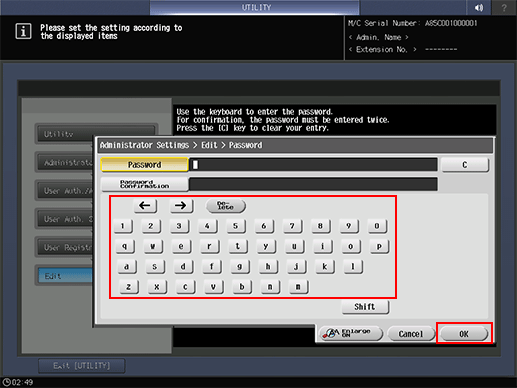
Press [OK] on each screen to complete the setting.
Press [E-mail Address], and enter the E-mail address.
You can enter up to 320 one-byte characters and symbols.
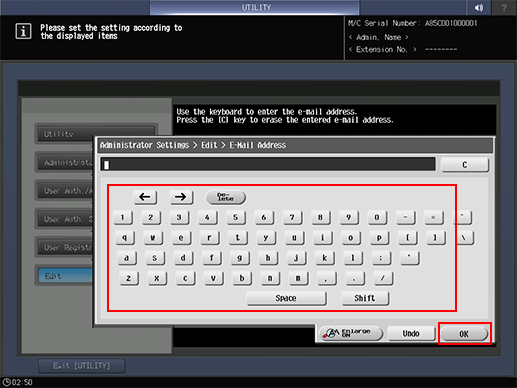
Press [OK] to complete the setting.
Press [Account Name] to select an account name.
Press [Account Name] to display the [Account Name] screen. Select the desired account name key.
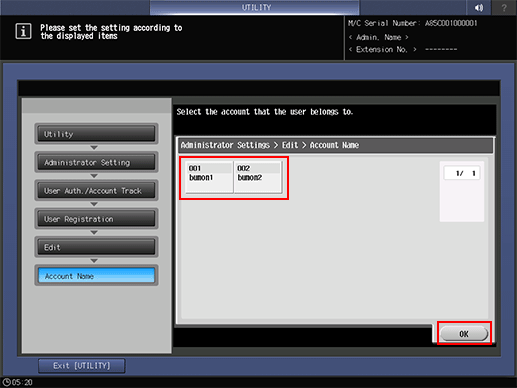
[Account Name] can be set only when [Synchronize] is selected for [SynchronizeUser/AccountTrack] in [Authentication Method]. Account Names must be registered in order to be available for selection.
Press [OK] to complete the setting.
Press [Max. Allowance Set] to set the value.
Press [Max. Allowance Set] to display the [Max. Allowance Set] screen. Enter the maximum limit from the keypad. If you press [Cansel], the value is reset and the Maximum Allowance is not set. Select [Package Change] to apply the current settings to all users.
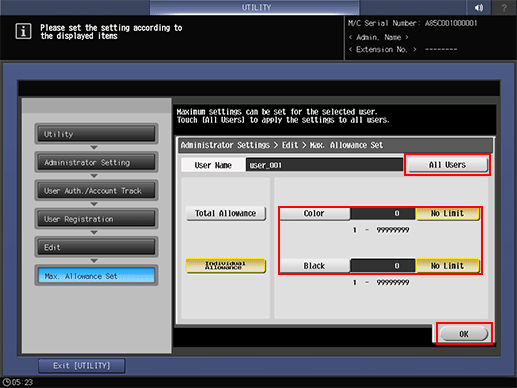
Press [OK] to complete the setting.
Select [Function Permission].
Select whether to allow the user of [Copy], [Scan], [Print], and [Stored Document Operation] for users. Selecting [All Users] applies the setting to all users.
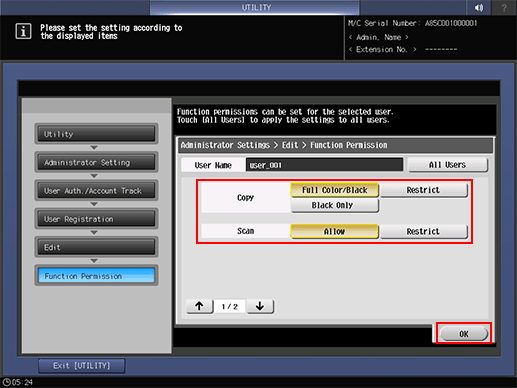
Press [OK] to complete the setting.
Press [Register Auth. Info.] to register an IC card.
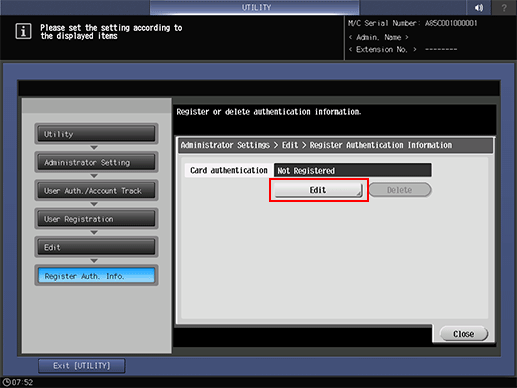
Press [Register Auth. Info.] to display the [Register Auth. Info.] screen. Press [Edit] to display the [IC Card Information Registration] screen. Hold the IC card over Authentication Unit AU-201S, connected to the main body. The screen returns to the [Register Auth. Info.] screen, and the display to the right of [IC Card Information] changes from [Unregistered] to [Registered].
To register a new IC card, also press [Edit] and hold the IC card over the authentication unit.
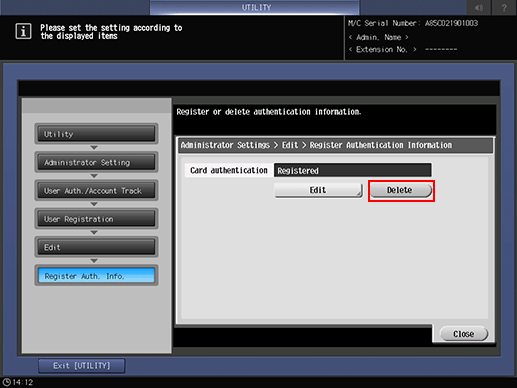
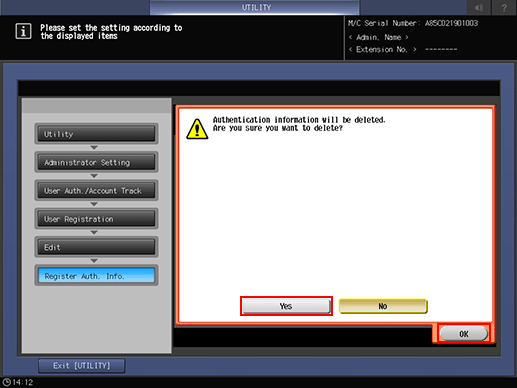
To delete the registered information of the IC card, press [Delete]. A confirmation dialog is displayed. Press [OK] to delete the former information and restore the display [Unregistered] on the right side of [IC Card Authentication].
Press [Close].
Change the [User Registration].
Select the user name to be changed, then press [Edit].
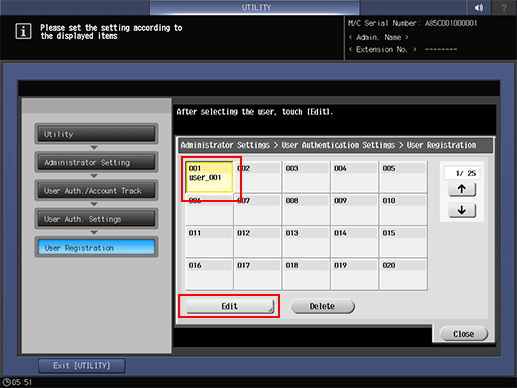
Setting options provided on the screen and setting method are the same as those of adding user data, described in step 3.
When finished with making the desired changes, press [OK].
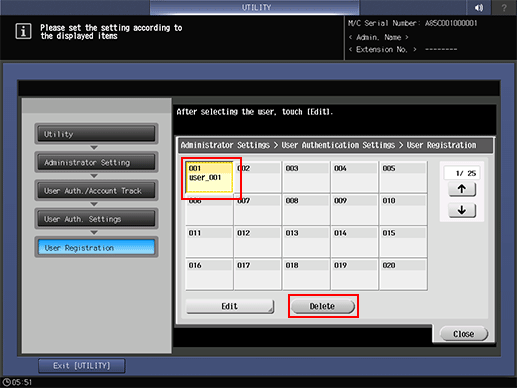
Delete user data.
Select the user name to be deleted, then press [Delete].
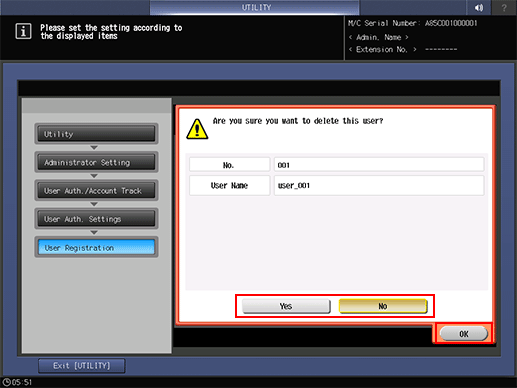
Press [Yes] on the confirmation dialog to delete it, and press [OK] for confirmation. Or, press [No] to cancel the deletion.
Press [Close].
The screen returns to the [User Authentication Setting] screen.

