
[Chart Adjustment]
Enter the measurement value after printing a chart and measuring the measuring points with scale.
Because the positions of both sides can be adjusted by only entering measurement values, this adjustment is useful for 2-sided printing with a new paper type or when the amount of misalignment between both sides is unknown after changing the paper in the tray.
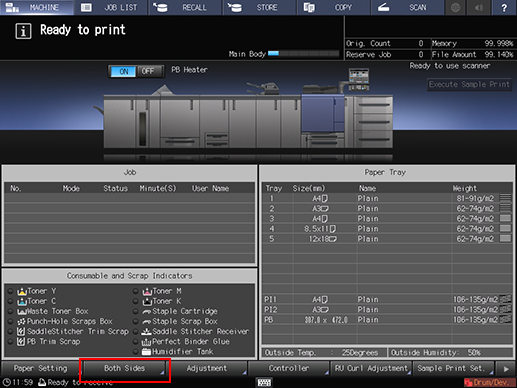
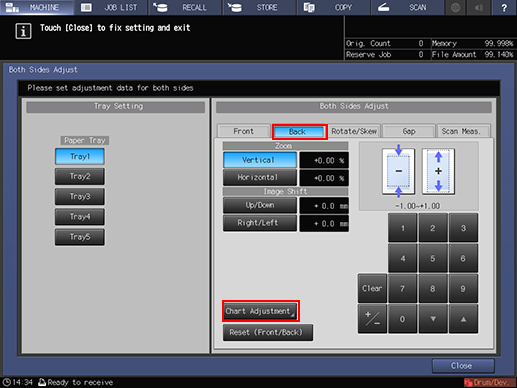
Press [Both Sides] on the [MACHINE] screen.
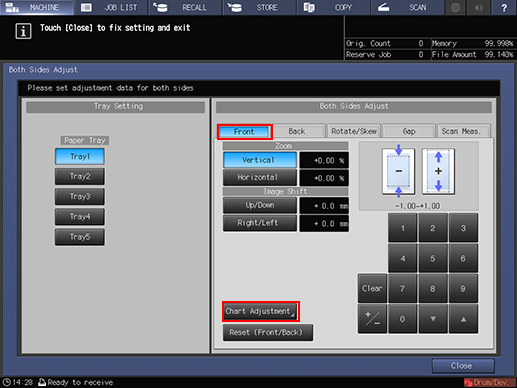
Select the tray in which the papers to be adjusted have been set.

Press [Front], and then press [Chart Adjustment].
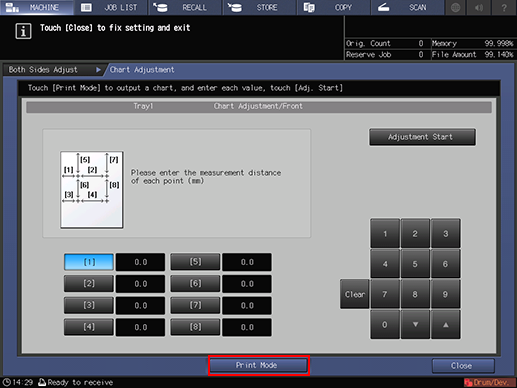
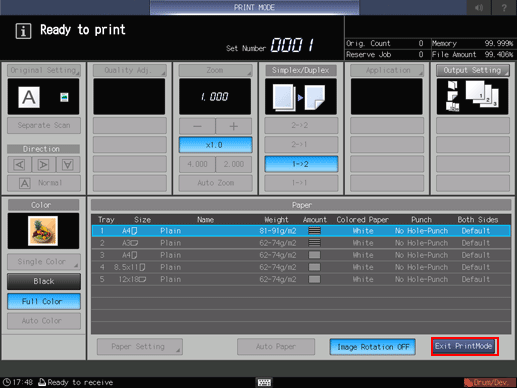
Press [Print Mode].
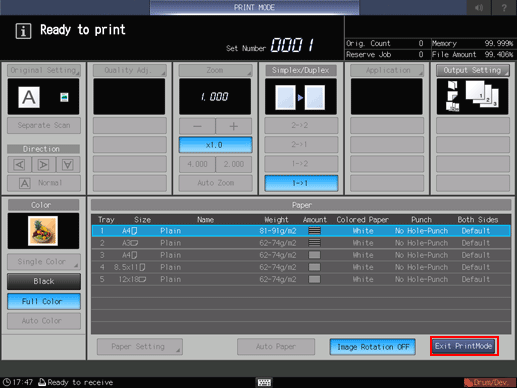
Press Start on the control panel.
A test chart is printed.
Press [Exit PrintMode].
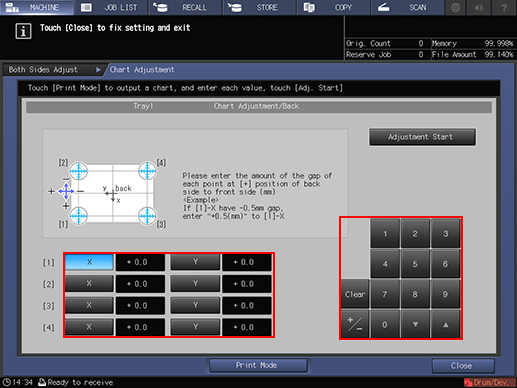
Measure the line length of each point from [1] to [8] in the output chart.
The figure shows an example where [1] and [5] are measured.
You can enter a value in 0.1 mm increments.
Be sure to make note of the measurement lengths.

Press the number of each point, and use the touch panel keypad or [
 ][
][ ] to enter the measured length.
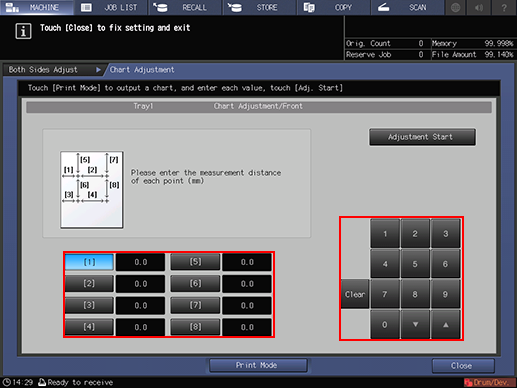
Press [Clear] to reset the value.
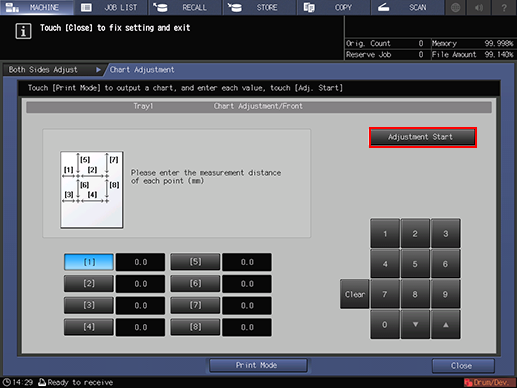
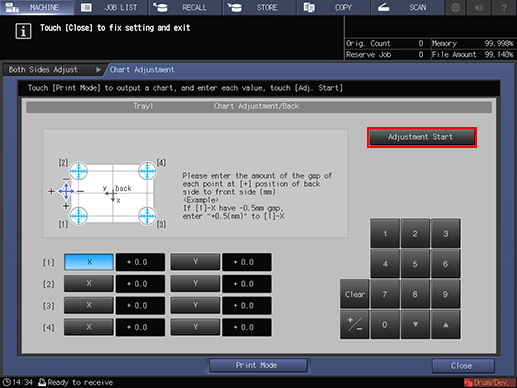
To start the adjustment, press [Adjustment Start].
In the next step, adjust the back side.
Press [Back], and then press [Chart Adjustment].
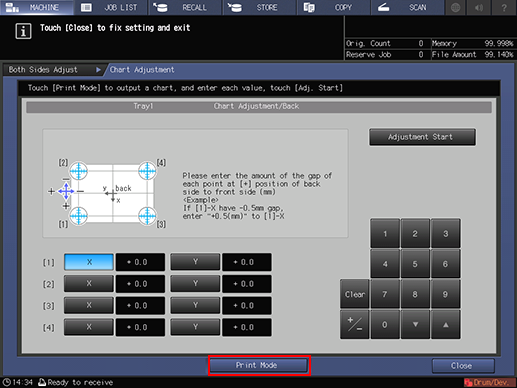
Press [Print Mode].
Press Start on the control panel.
A test chart is printed.
 mark is printed on the [front] side <Front Side> so that you can recognize which tray output the chart. For details, refer to Chart.
Press [Exit PrintMode].
Measure the misalignment between
 of [1] to [4] on the [back] side <Back Side> and on the [front] side <Front Side> of the printed chart.
The figure shows an example to measure [1]. The scale resolution is 0.5 mm.
The black
in the figure indicates the front side, and the blue indicates the back side.
Measure the X and Y directions to check the misalignment of print position.
You can enter a value in 0.1 mm increments.
Be sure to make note of the measurement values.
For example, when
of [1] is misaligned leftward (plus side of X direction) by 2.0 mm and downward (minus side of Y direction) by 1.5 mm from the one on the front side as shown in the figure, press in order of [2][0][+/-] and enter -2.0 to correct and move rightward (minus side of X direction) the blue line on the back side by 2.0 mm in the X direction. And also press in order of [1][5] and enter +1.5 to correct and move upward (plus side of Y direction) by 1.5 mm in the Y direction.

Press [X] or [Y] of each point, and use the touch panel keypad or [
][] to enter the measurement value.If the print position is misaligned rightward or downward (minus side), enter a positive value. If misaligned leftward or upward (plus side), enter a negative value.
Use [+/-] to specify the value to be positive or negative.
Press [Clear] to reset the value.
To start the adjustment, press [Adjustment Start].
Press [Close].
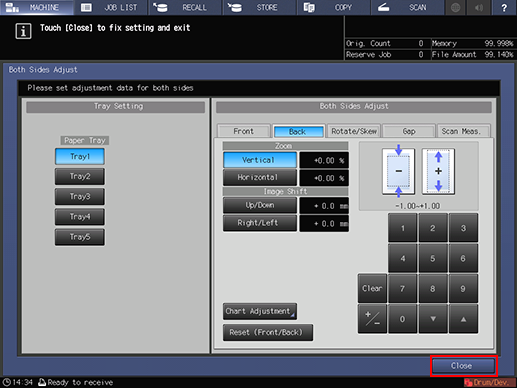
Now, the [Chart Adjustment] is completed.
For fine adjustment, perform Zoom/Image Shift Adjustment.