
[Gap] Adjustment
Adjust the magnification and image position of the back side based on the image position of the front side.
Enter the adjustment data that is acquired by printing a chart and measuring gap between the front and back sides at the measurement point of back side.
Because the adjustment can be performed by only entering adjustment data, it is convenient for 2-sided printing with new paper type or when the misalignment of the back side is not clear after changing the paper in the tray.

[Gap] adjustment is the simple method to adjust the magnification and image position of the back side only. To make adjustments, including for the front side, perform the procedure described in AutoMeasure adjustment, Chart Adjustment, or Zoom/Image Shift Adjustment.
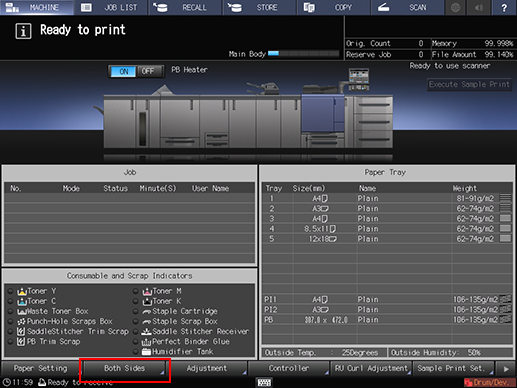
Press [Both Sides] on the [MACHINE] screen.
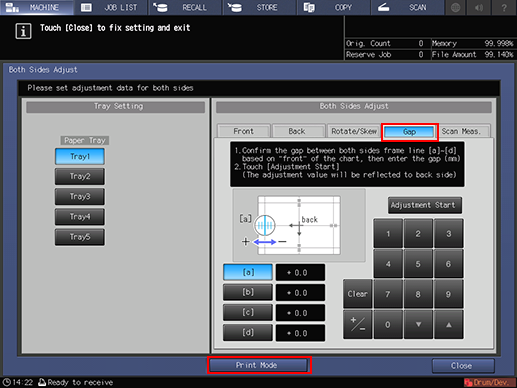
Press [Gap], then press [Print Mode], after selecting the tray loaded with paper for adjustment.
Press Start on the control panel.
A test chart is printed.
 mark is printed on the [front] side <Front Side> so that you can recognize which tray output the chart. For details, refer to Chart.
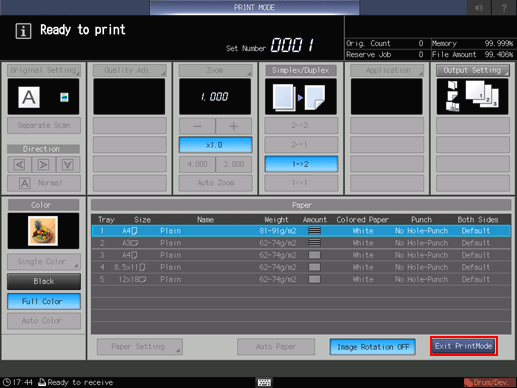
Press [Exit PrintMode].
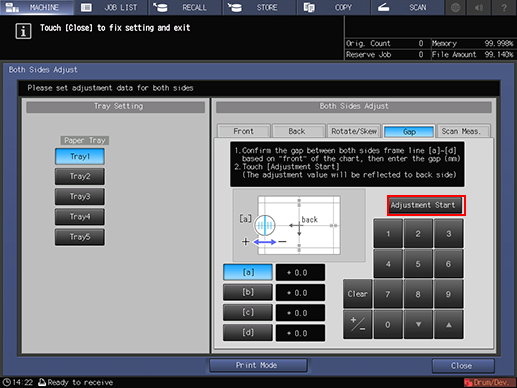
Measure the gap between the front and back sides at each point of [a] to [d] on the [back] side <Back Side> of printed chart to acquire the adjustment data.
The figure shows an example to measure [a]. The scale resolution is 0.5 mm.
The black lines in the figure indicate the front side and the blue lines indicate the back side.
You can enter a value in 0.1 mm increments.
Be sure to make note of the measurement values.
For example, when [a] scale is misaligned upward (plus side) by 1.5 mm from the one on the front side as shown in the figure, press in order of [1][5][+/-] and enter -1.5 to correct and move downward (minus side) the blue line on the back side by 1.5 mm.

Press each point key of [a] to [d] to enter the adjustment data by numeric keys or [
 ], [
], [ ] on the screen.
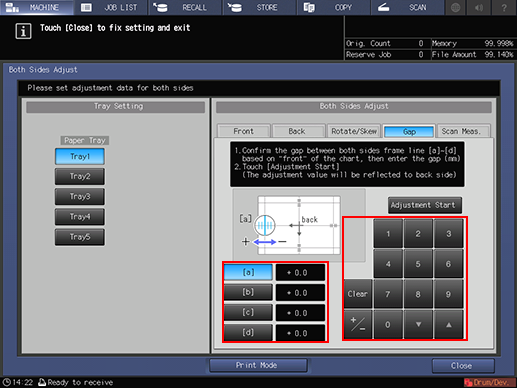
If the print position is misaligned rightward or downward (minus side), enter a positive value. If misaligned leftward or upward (plus side), enter a negative value.
Use [+/-] to specify the value to be positive or negative.
Press [Clear] to reset the numeric value you are currently entering.
To start the adjustment, press [Adjustment Start].
The input values are reset when you press [Front] or [Back] before pressing [Adjustment Start]. When the adjustment is required, press [Adjustment Start] after reentering the adjustment data of each point.
The adjustment data entered is applied to each point of [Back].
When [Back Side Magnification Adjustment] is set to [OFF], [d] (Horizontal adjustment data of the back side) is not applied. For details about [Back Side Magnification Adjustment], refer to Common Setting: Setting the Various Operations of the Machine.
Press Start on the control panel.
A test chart is printed.
Check the misalignment of print position by output chart .
Repeat Step 5 to 9 until the front and back are aligned.
Press [Exit PrintMode].
Press [Close].
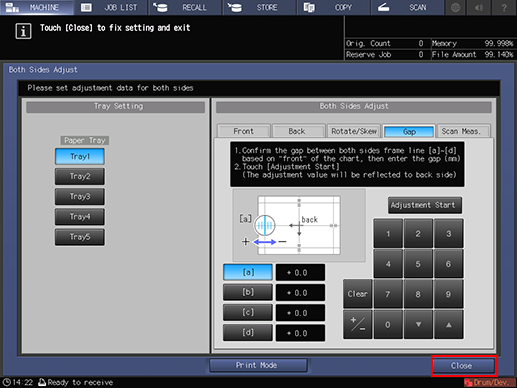
Now, the [Gap] adjustment is completed.
For fine adjustment, perform Zoom/Image Shift Adjustment.