Scan Address Register
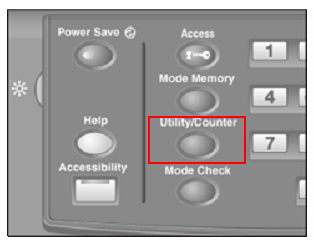
Press Utility/Counter on the control panel to display the [UTILITY] screen.
To send scan data to a destination, you can enter its address every time or you can select the destination from registered destinations. Sending scan data is made easy by registering frequently-used destinations.
Also, specify the subject and text of E-mail. Sending E-mail is made easy by registering frequently-used subjects and messages.
Registering an E-mail Address as a Destination
Registering a User Box as a Destination
Registering an FTP Server as a Destination
Registering an SMB Server as a Destination
Registering a WebDAV Server as a Destination
Registering a Group as a Destination
Changing Information of a Destination and Deleting a Destination
Registering a Subject and a Message of E-mail
Displaying the [Scan Address Register Menu] screen
Press the Utility/Counter key.
Press [Scan Address Register].
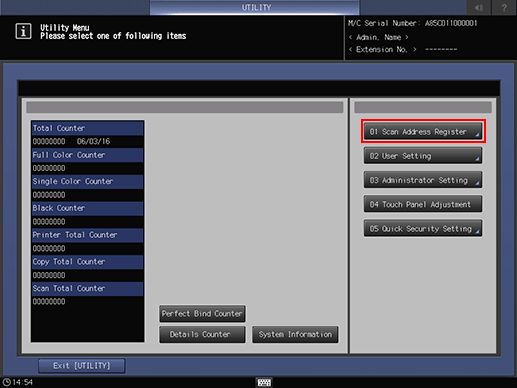
The [Scan Address Register Menu] screen is displayed.
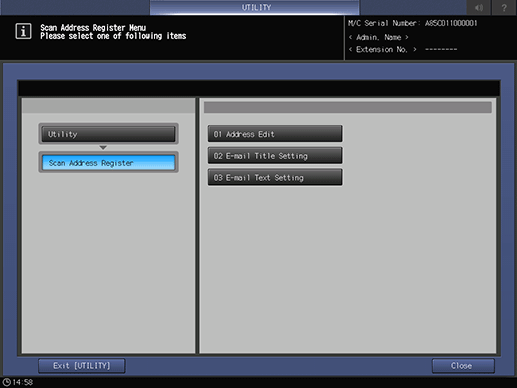
To exit the [UTILITY] screen, press [Exit [UTILITY]].
To return through the hierarchy of the [UTILITY] menu, press [Close] or select a level on the left side of the screen.
Name | Description |
|---|---|
[Address Edit] | Add or delete a destination. Also, edit registered information of a destination. Registering an E-mail Address as a Destination Registering a User Box as a Destination Registering an FTP Server as a Destination Registering an SMB Server as a Destination Registering a WebDAV Server as a Destination Registering a Group as a Destination Changing Information of a Destination and Deleting a Destination |
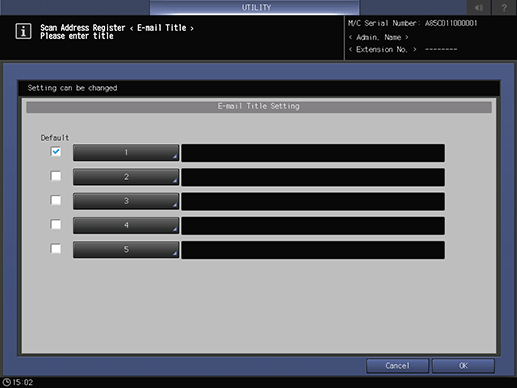
[E-mail Title Setting] | Register up to 5 E-mail subjects. Also, edit registered subjects. |
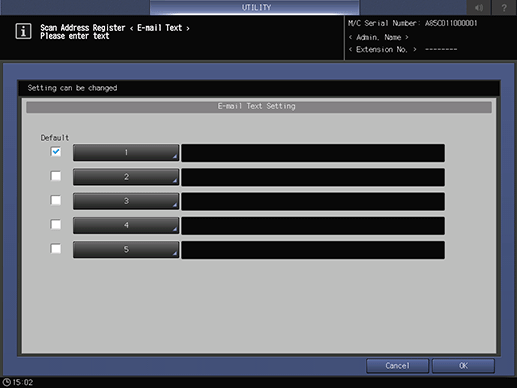
[E-mail Text Setting] | Register up to 5 E-mail texts. Also, edit registered texts. |