
Registering a WebDAV Server as a Destination
Register a WebDAV server. Sending scan data to an WebDAV server is made easy by registering the WebDAV server as a destination.
You can register up to 30 WebDAV servers.
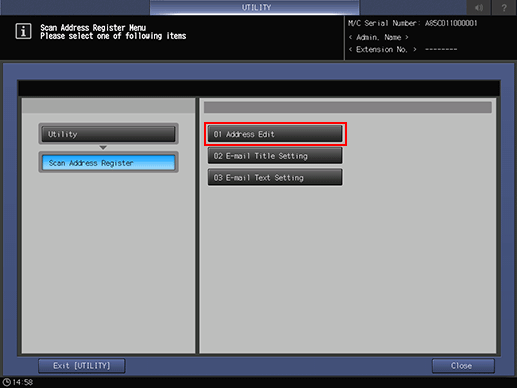
Follow the procedure on Scan Address Register to display the [Scan Address Register Menu] screen.
Press [Address Edit].
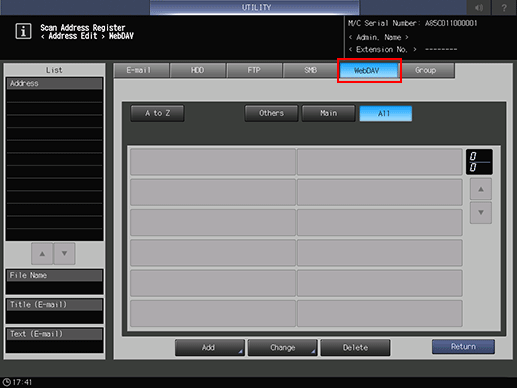
The [Scan Address Register] screen is displayed.
Press [WebDAV].
As default, the E-mail address list is displayed.
You can specify a destination tab that is displayed by default in [Scan Setting].
For details, refer to Scan Setting: Setting the Default Values for Scan Functions in User Setting or Scan Setting: Setting the Default Values for Scan Functions in Administrator Setting.
Press [Add].
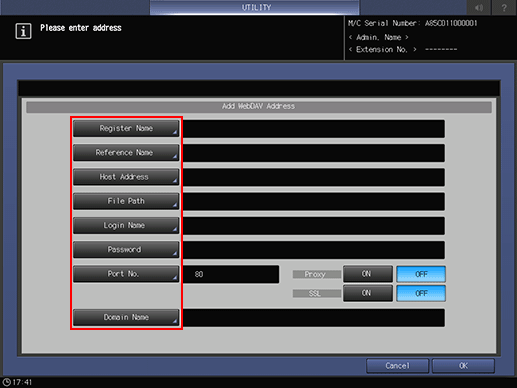
Enter information of a destination on the [Add WebDAV Address] screen. Pressing each item displays each screen to enter characters.
For details about how to enter characters, refer to Inputting Characters.
[Register Name]
Enter a name of a destination.
If you register the name, it is displayed on the destination list.
You can enter up to 24 one-byte characters (12 two-byte characters).
[Reference Name]
Enter text to search for a destination.
You can enter up to 24 one-byte characters (12 two-byte characters).[Host Address]
Enter the address of a WebDAV server.
You can enter up to 253 one-byte characters.[File Path]
Enter the file path of a WebDAV server.
You can enter up to 142 one-byte characters (71 two-byte characters).[Login Name]
Enter the account of a WebDAV server.
You can enter up to 64 one-byte characters (32 two-byte characters).[Password]
Enter the password for a WebDAV server.
You can enter up to 32 one-byte characters.The entered password is shown by "*".
[Port number]
Enter a port number used by a WebDAV server. Enter 5 digits (00001 to 65535).
The default setting is 80. No configuration is required under the normal condition.
Contact your network administrator about your port number.
[Proxy]
Select whether to use a proxy server.
If the destination is an external server, select [ON].
To use a proxy server, you need to make the settings for using the proxy server, from [UTILITY] screen.
For details, refer to NIC Setting: Setting the Machine Network Information and FTP TX Setting.
[SSL ]
Select whether to use SSL. If the destination is an external server, select [ON].
[Domain Name]
Enter the domain name of a WebDAV server.
Up to 64 one-byte characters can be used.
Press [OK].
Check that the registration is completed.
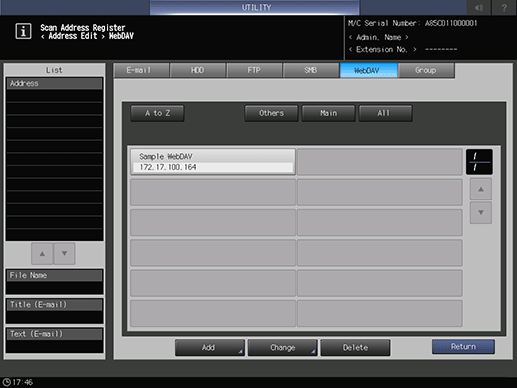
If destinations cannot be displayed on one page, press [
 ] or [
 ] to switch between pages.