
Applying the Saved Tone Curve When Printing
You can apply the saved tone curve when printing.
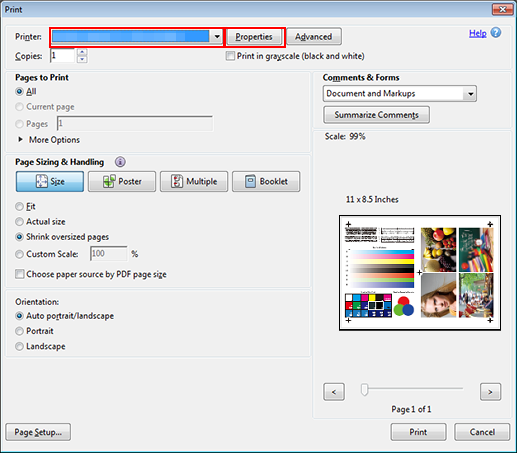
Open the original data with the application, and then click [Print] on the [File] menu.
Example: Sample B (B_sample.pdf) is used.
Select the printer to use for printing and click [Properties].
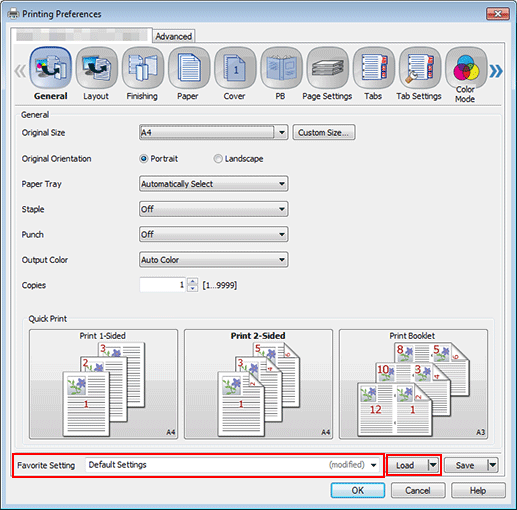
Select [Default Settings] for [Favorite Setting] and click [Load].
Before setting the tone curve, restore the default setting.
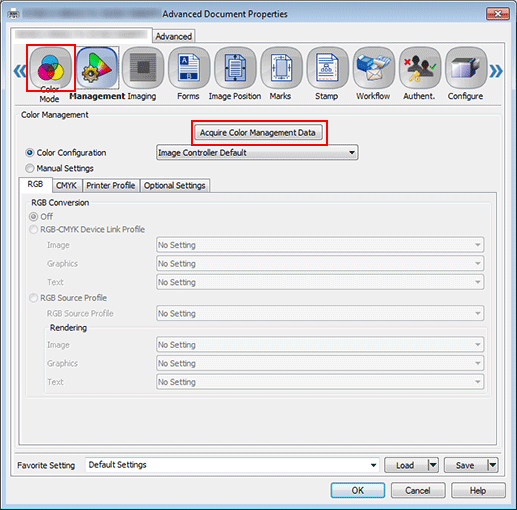
Click the [Management] tab, and then click [Acquire Color Management Data].
When the color management data is acquired, a green checkmark is displayed.
If the [Management] tab is not displayed, click
 to switch the tab display.
If the color management data could not be acquired, a red
 mark is displayed. Check if an optional paper tray is correctly mounted.
Click [Optional Settings] and clear [Use Default Setting of Selected Color Configuration].
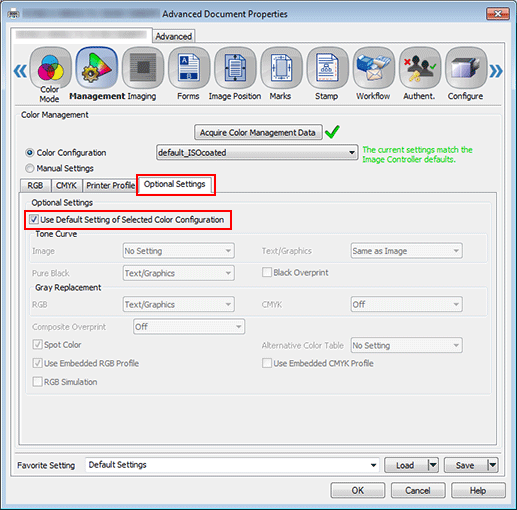
If [Use Default Setting of Selected Color Configuration] under [Optional Settings] is checked, remove the check. If this is checked, tone curve cannot be selected.
Under [Tone Curve], select the tone curve you want to apply and click [OK].
You can set different tone curves for [Image] and [Text/Graphics].
Example: "Sample-Curve" is selected.
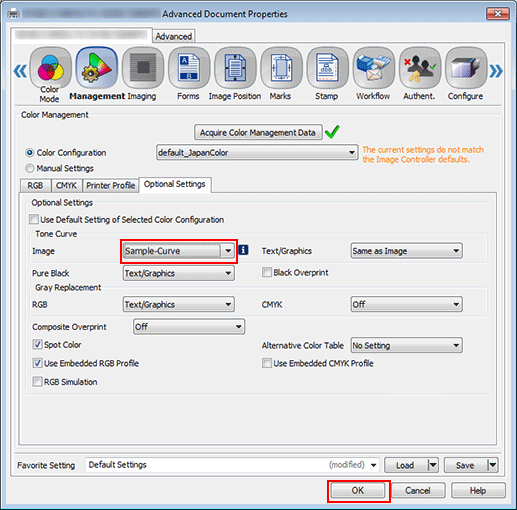
A warning symbol
 is displayed when you set a tone curve. This is because it is different from the controller's current default setting. Proceed by clicking [OK].
On the [Print] screen, enter the [Copies] and click [Print].
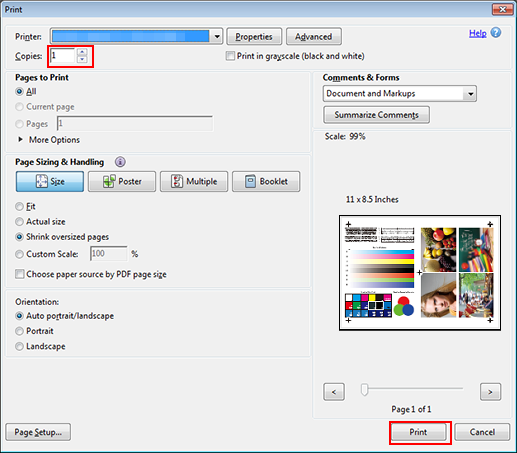
The original is printed using the applied tone curve.