
Scanner: Using Scan to SMB with Windows Shared Folder
It is possible to send a large volume of scan data from the machine to the shared folder created on the Windows computer (supporting SMB protocol) on the network.
From a computer connected to the network, you can access the shared folder, and import and save a large volume of scan data.
A large volume of scan data (more than 10 MB) is sent more securely than by E-mail. You can share data easily without configuring a full-scale FTP server.
• Examples Introduced in This Section
Create a shared folder "Scan-SMB" on the desktop of the Windows computer and send the scan data (PDF) with the Scan to SMB function from the machine.

•Intended Environment
Network | The machine and the SMB server (Windows computer) are connected to the network. |
SMB server OS | Windows 7 Enterprise |
Image Controller | Image Controller IC-603 |
* The sample screen may be different from the actual display depending on your system environment and application version/revision.
•Workflow
STEP 1: Creating a shared folder on the Windows desktop
•Create and set a shared folder on the Windows computer.
STEP 2: Checking the SMB server setting
STEP 3: Registering the SMB server to the machine
•Register the destination information on the touch panel of the main body.
STEP 4: Sending the scan data to the SMB server
•Precautions
How to create and set a shared folder differs depending on the settings and environment of the computer used.
If you use Scan to SMB with Image Controller IC-603 and Mac OS 10.8 or later, the following settings are required.
Only NTLMv2 is supported. For details about the setting, refer to NIC Setting Menu: Configuring the Network Information of the Controller.
Match the date and time of the machine with those of a computer (including a time zone). For details about the date/time setting of the machine, refer to Date/Time Setting: Setting the Date and Time.
Creating a shared folder on the Windows desktop
Create a shared folder on the Windows computer. You can receive the scan data sent from the machine to the shared folder and share it with a client computer.
Create a shared folder on the Windows computer.
Example: A folder named "Scan-SMB" is created on the desktop of Windows 7.
Shared folder to be created
Setting
Location
Desktop
Folder Name
Scan-SMB
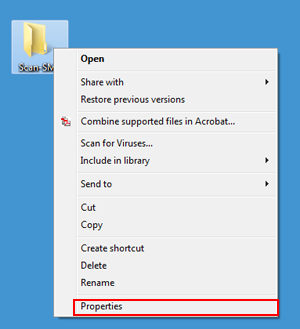
Right-click the shared folder you created and select [Properties].
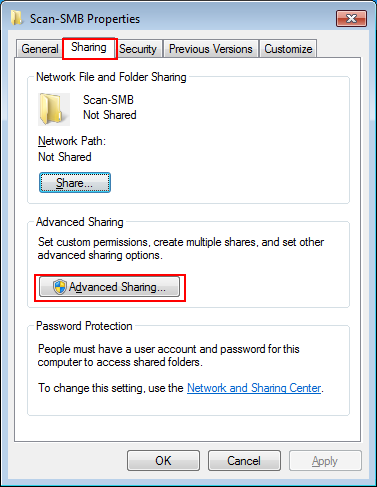
Click the [Sharing] tab and click [Advanced Sharing].
The Advanced Sharing window is displayed.
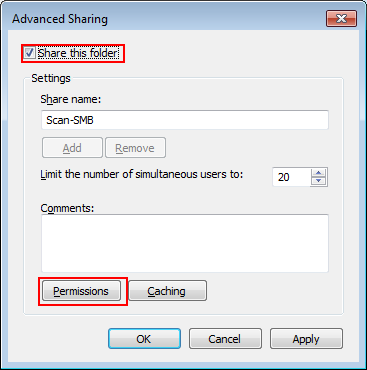
Add a check mark to [Share this folder] and click [Permissions].
Set [Share name] as necessary.
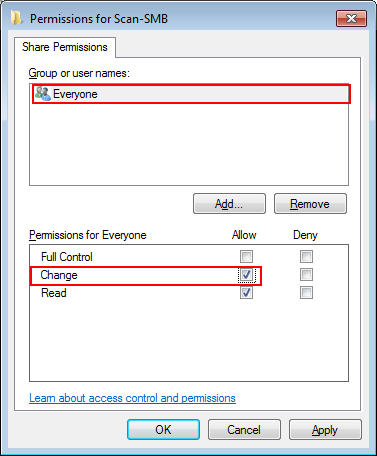
The folder access permission window is displayed.
Select the group/user name to give access permission and add a check mark to [Change] of [Allow]. Click [OK].
To give access permission to a specific group or user, click [Add] and add the group or user.
Example: [Everyone] (all users) is permitted to access.
Item
Setting
[Group or user names]
[Everyone] (All users)
[Permissions for ###]
Add a check mark to [Change] of [Allow]
To permit accessors to delete a file, add a check mark to [Full control].
Click the [Security] tab and click [Edit].
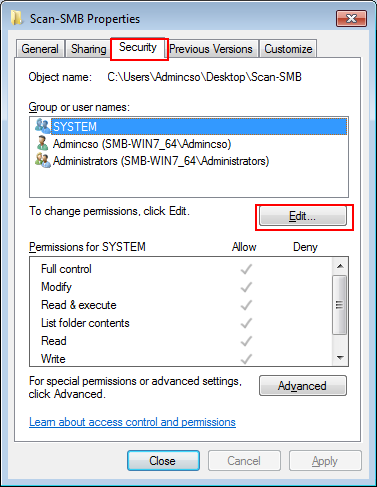
The security access permission window is displayed.
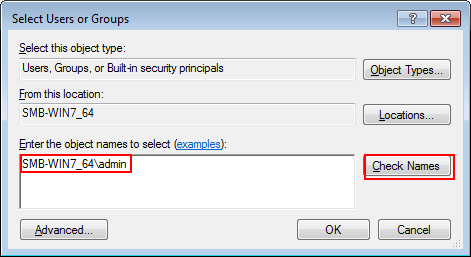
Click [Add].

In the [Enter the object names to select] field, enter "computer (or domain) name\user name" and click [Check Names].
If the computer name or domain name is displayed in [From this location], the computer (or domain) name can be omitted.
Example: Access permission is given to "SMB-WIN7_64\admin."
Item
Setting
[Enter the object names to select]
"SMB-WIN7_64\admin"
Computer (or Domain) name: SMB-WIN7_64
User name: admin
If the computer name or domain name is unknown, check it in the following procedure.
(1) Right-click the [Computer] icon on the desktop and select [Properties].
(2) Click [Advanced system settings] and the [Computer Name] tab.
(3) Click [Change] and check [Computer Name].
If you are not sure of the user name, check with the command prompt (cmd.exe). Enter "set user" and press the Enter key to display the user name to the right of [USERNAME =.]
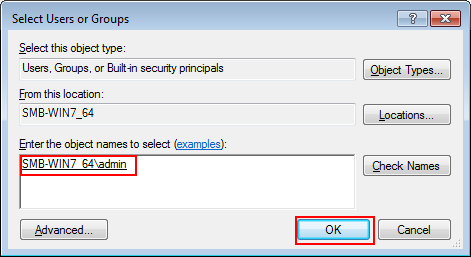
When the user name is underlined, click [OK].
If "computer (or domain) name\user name" entered in step 8 is wrong, "An object named ### cannot be found" is displayed when you click [Check Names]. Enter the correct "computer (or domain) name\user name."
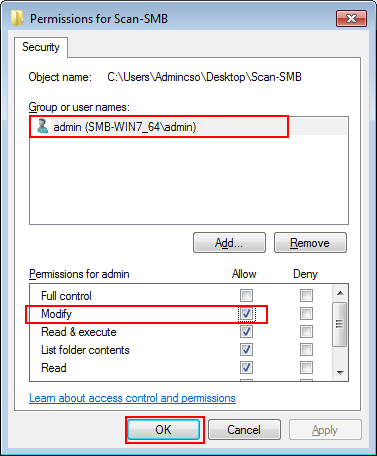
Select the user name entered in step 9 and add a check mark to [Modify] of [Allow]. Click [OK].
Item
Setting
[Permissions for ###]
Add a check mark to [Modify] of [Allow]
To permit accessors to delete a file, add a check mark to [Full control].
Checking the SMB server setting
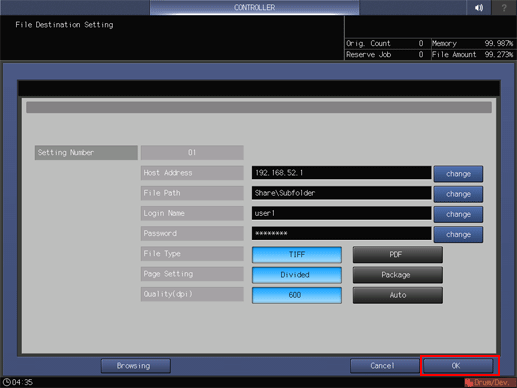
The following information is necessary to register the destination SMB server (shared folder) to the machine. Write down the following items.
Item | Description | Note |
|---|---|---|
Host Address | IP address of the SMB server
| |
[File Path] | Specify the file path (shared folder name) of the SMB server (shared folder). | |
[Login Name] | Login user name of the SMB server (Windows computer)
| |
[Password] | Login user password of the SMB server (Windows computer)
|

Registering the SMB server setting to the machine
Register the destination SMB server to the machine on the touch panel of the main body.
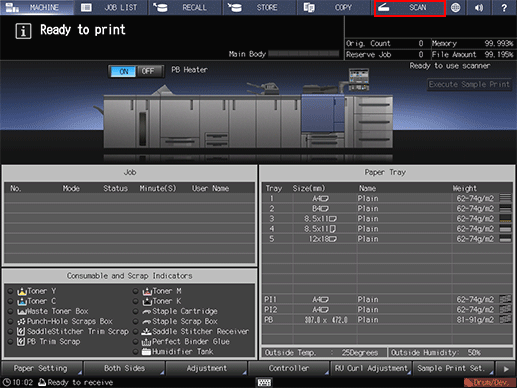
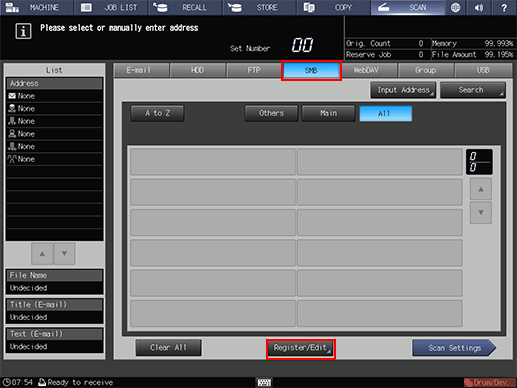
On the touch panel of the main body, press [SCAN].
Press [SMB] and press [Register/Edit].
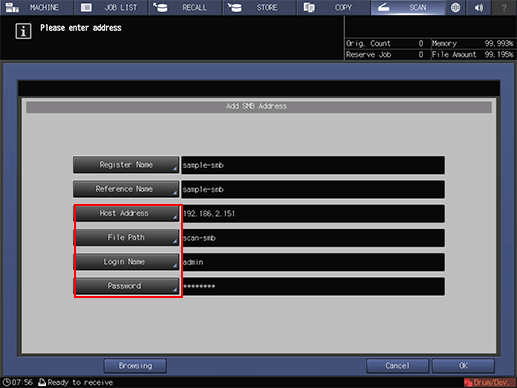
Press [Add].
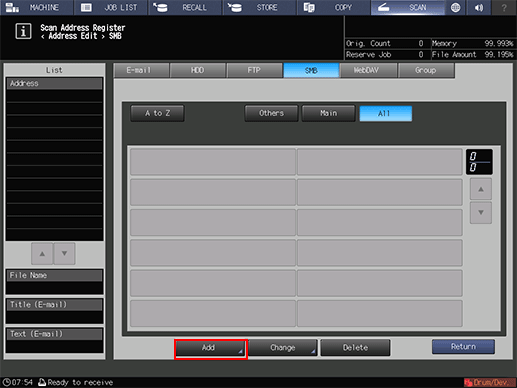
The [Add SMB Address] screen is displayed.
Press [Register Name].

Enter the registration name and press [OK].
For details about how to enter, refer to Inputting Characters.
Example: "sample-smb" is entered as the registration name.
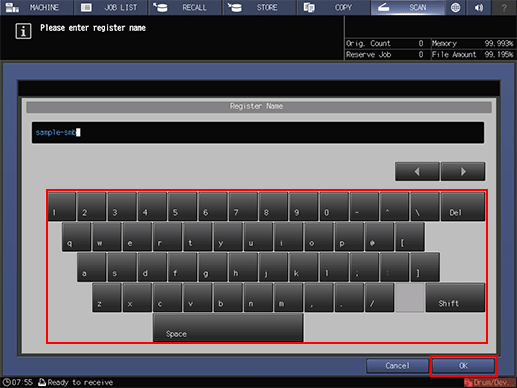
[Register Name] and [Reference Name] are entered.
Press the [Host Address], [File Path], [Login Name] and [Password] items and enter the settings in the same manner.
After entering the items, press [OK].
Check that the SMB server has been registered.

Press [Return].
To Search for an SMB Server Using the Host Address
Enter the contents you wrote down in Checking the SMB server setting.
 Each item is required.
To Search for a Host Address from a Browsing List
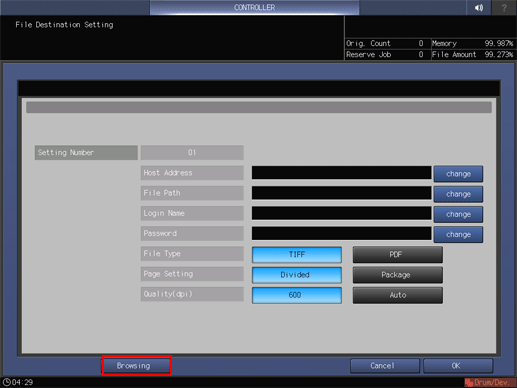
Press [Browsing] on the [File Destination Setting] screen.
Press [Browsing] to display the browsing list for networks.
Select a workgroup name and press [Down].
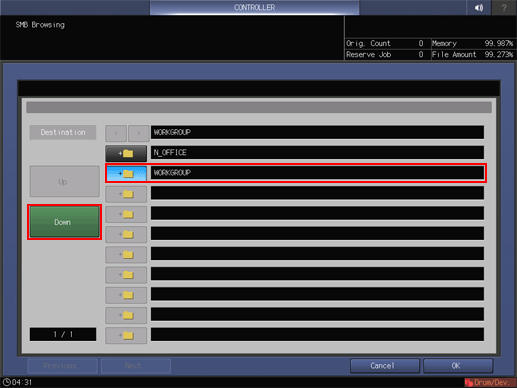
When the list consists of more than one page, you can move between pages by pressing [Previous] or [Next].
It can display up to 512 workgroups.
Select a workgroup name and press [Down].
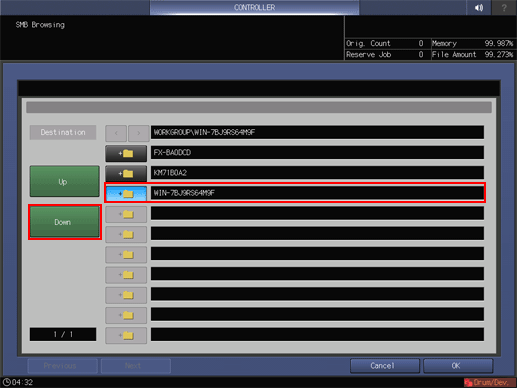
When the list consists of more than one page, you can move between pages by pressing [Previous] or [Next].
Press [Up] to move to the upper level.
It can display up to 512 computers.
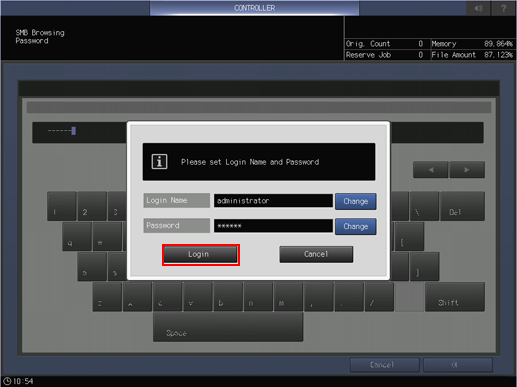
The authentication screen is displayed. Press [Change] for both the login name and password, and then input the authentication information.
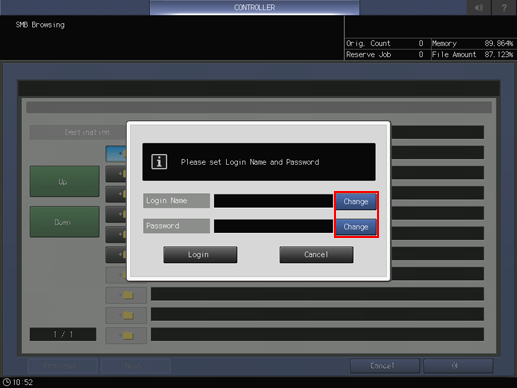
Press [Login].
Select a destination folder, and then press [OK].
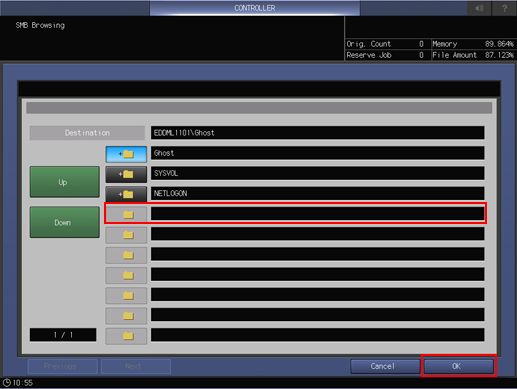
Press [Up] to move to the upper level.
It can display up to 256 folders.
If the file path length exceeds the maximum (80 one-byte characters/40 two-byte characters), you can set the file path within the length.
Press [OK].
Sending the scan data to the SMB server
Send the scan data to the SMB server from the machine.
Select the SMB address registered and press [Scan Settings].
After pressing [SCAN], press [SMB] to display this screen.
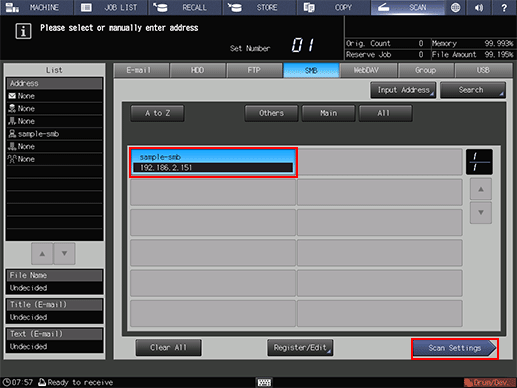
Set the image quality, resolution and other items.
For details about each item on the screen, refer to Scan Settings Screen.

Set an original, and then press Start on the control panel.
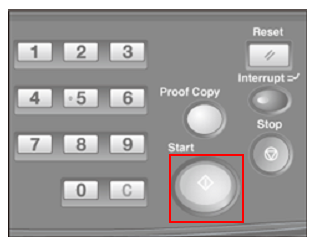
The original is scanned and sent to the SMB server (shared folder).