
Staple Center Position
Adjust the staple center position of Saddle Stitcher SD-506 to reduce a misalignment between staples and paper.
NOTICE
After Saddle Stitcher Adjustment - Staple Paper Width Adj. was completed, perform this adjustment.
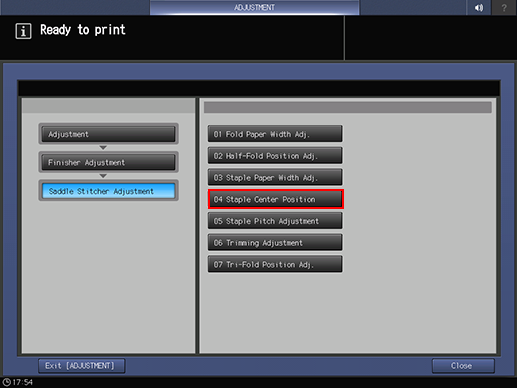
Press Adjustment on the MACHINE screen to display the Adjustment Menu screen.
Press Finisher Adjustment, Saddle Stitcher Adjustment, and Staple Center Position in sequence.
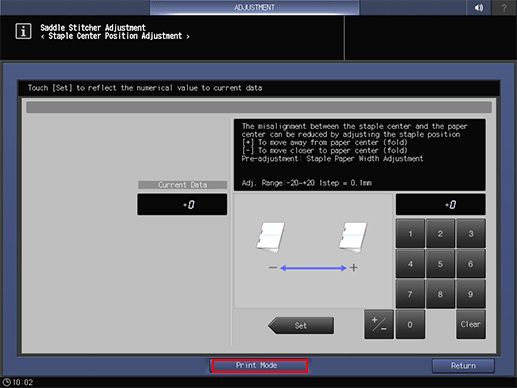
Press Print Mode.
Load the desired paper into a tray, then select that tray.
Press Start on the control panel.
A sample pattern will be output.
NOTICE
Without the saddle stitcher tray withdrawn, the machine does not start printing even if Start on the control panel is pressed. Be sure to withdraw the saddle stitcher tray.
Measure the difference (a) between the center line and the position of staples.
Allowance: a = 0 mm ± 2 mm
[1] Paper Center [2] Staple Center Position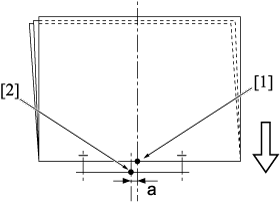
If any adjustment is required, press Exit PrintMode to return to the Staple Center Position Adjustment screen.
Use the touch panel keypad to enter the set value.
Adj. Range: -20~+20 1 step = 0.1 mm
[-] To move closer to paper center (fold) [+] To move away from paper center (fold)
supplementary explanationUse +/- to specify the value to be positive or negative.
supplementary explanationPress Set to change the Current Value.

Repeat steps 3 to 8 until the desired result is obtained.
Press Return.
The screen returns to the Saddle Stitcher Adjustment Menu screen.