
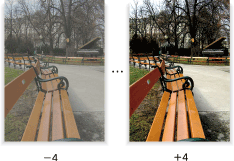
Contrast: Adjusting Difference between Bright Area and Dark Area of Image
Adjust the difference of brightness between bright areas and dark areas of the copy image.
Original | Output |
|---|---|
| Contrast
|

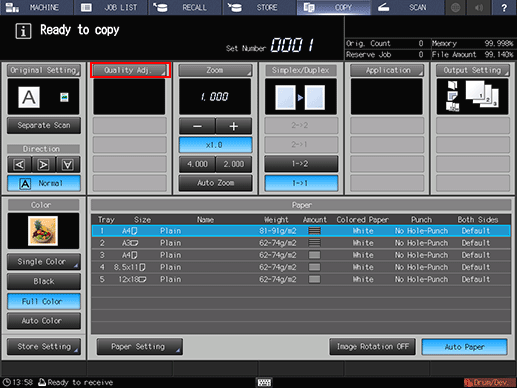
Press the [COPY] tab to display the [COPY] screen.
Press [Quality Adj.] on the [COPY] screen.
Position the original.
Prepare an original for adjusting the contrast, and position it into the ADF or on the original glass.
Make an adjustment for Contrast on the [Quality Adjustment] screen.
Use [-] and [+] on the right side of [Contrast] to specify the desired adjustment level.
Specify a negative level to decrease the contrast of copy image, or a positive level to increase it.
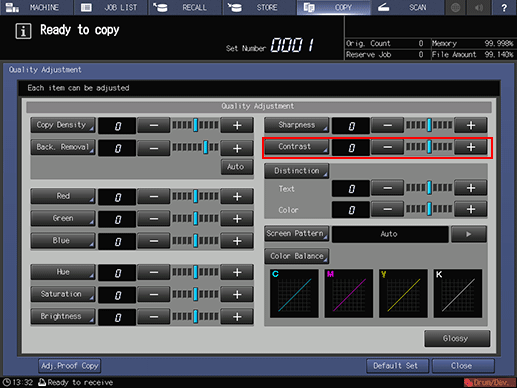
To make the adjustment for Contrast on the [Contrast] screen, proceed to step 5.
To resume the standard level, select [0].
To output a sample copy to check the adjustment result, proceed to step 6.
To complete the adjustment, proceed to step 7.
If you press [Default Set] on the [Quality Adjustment] screen, all adjustment items are returned to the standard level.
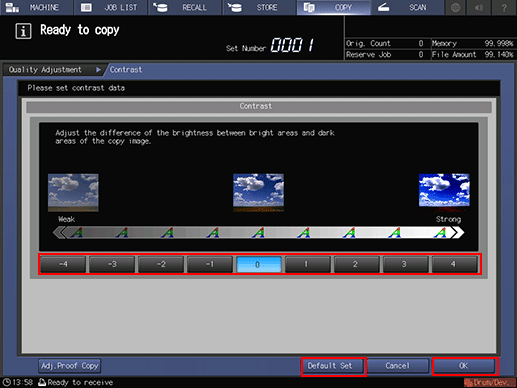
Make an adjustment for Contrast on the [Contrast] screen.
Press [Contrast] to display the [Contrast] screen.
Select one from [-1] to [-4] to decrease the contrast of copy image.
Select one from [1] to [4] to increase the contrast of copy image.
To resume the standard level, select [0].
To resume the standard level and return to the [Quality Adjustment] screen, press [Default Set].
To output a sample copy to check the adjustment result, proceed to step 6.
To complete the adjustment, press [OK] and proceed to step 7.
Output a sample copy.
After making the desired adjustment, press [Adj.Proof Copy] on the [Quality Adjustment] screen, [Adj.Proof Copy] on the [Contrast] screen, or Proof Copy on the control panel. Check the adjustment result with output image.
Repeat steps from 3 to 6 until the desired result is obtained.
Press [Close] on the [Quality Adjustment] screen.
The screen returns to the [COPY] screen. The [Contrast] indication can be found under [Quality Adj.] on the [COPY] screen.