
Outputting the Density Balance Chart
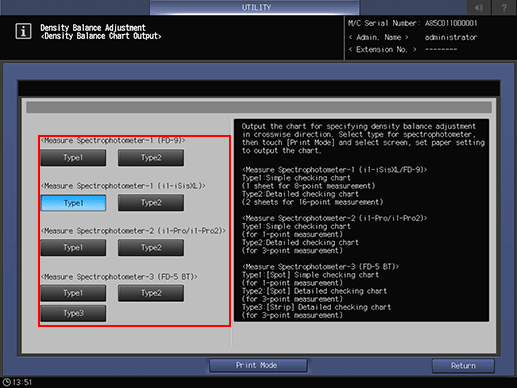
There are four types of spectrophotometers to read the chart.
i1-iSisXL
FD-9
i1-Pro/i1-Pro2
FD-5 BTOutput a chart to which the screen type that has been set by the machine was applied.
Before outputting the chart, an appropriate screen and paper must be selected.

The screen type can be changed in UTILITY. For details, refer to Custom Screen: Selecting the Screen Type.
Follow the procedure on Administrator Setting to display the [Administrator Setting Menu] screen.
Press [System Setting] on the [Administrator Setting Menu] screen, and then press [Expert Adjustment], [Quality Adjustment], [Density Balance Adjustment], and [Density Balance Chart Output] in sequence.
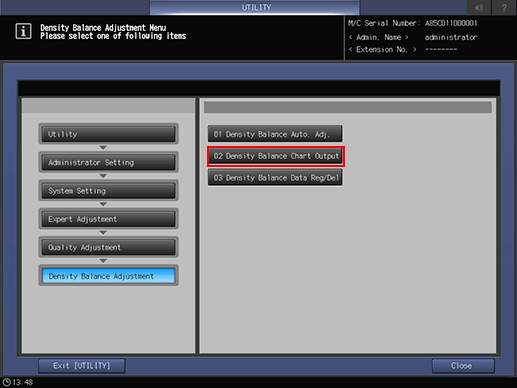
Select the desired spectrophotometer, and press [Print Mode].
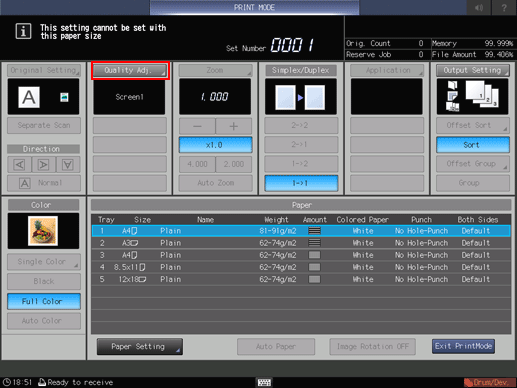
Press [Quality Adj.].
Press [
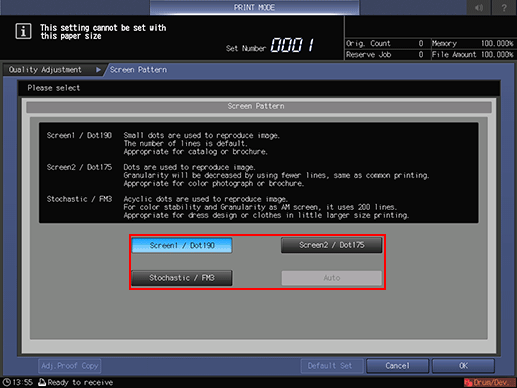
 ] on the right side of [Screen Pattern] to display the desired screen.
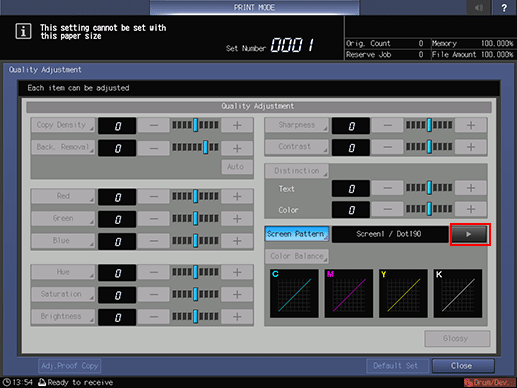
If necessary, you can press [Screen Pattern] to display the [Screen Pattern] screen and select any screen. Select a screen, and press [OK].
Press [Close] on the [Quality Adjustment] screen.
Select a paper size for the chart.
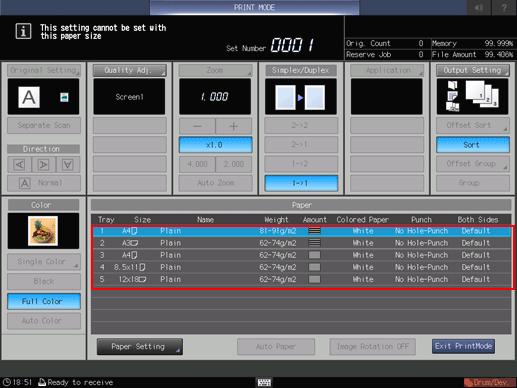
Load 12
 18
18  , SRA3 , 11 17 , or A3 paper in a tray, then select that tray.
Press Start on the control panel.
A test chart is printed.
Press [Exit PrintMode].
The screen returns to the [Density Balance Chart Output] screen.
Press [Return].
The screen returns to the [Density Balance Adjustment Menu] screen.